Pages

4.28.2012

DIY Cloth Diaper Doublers (AKA "Soakers")


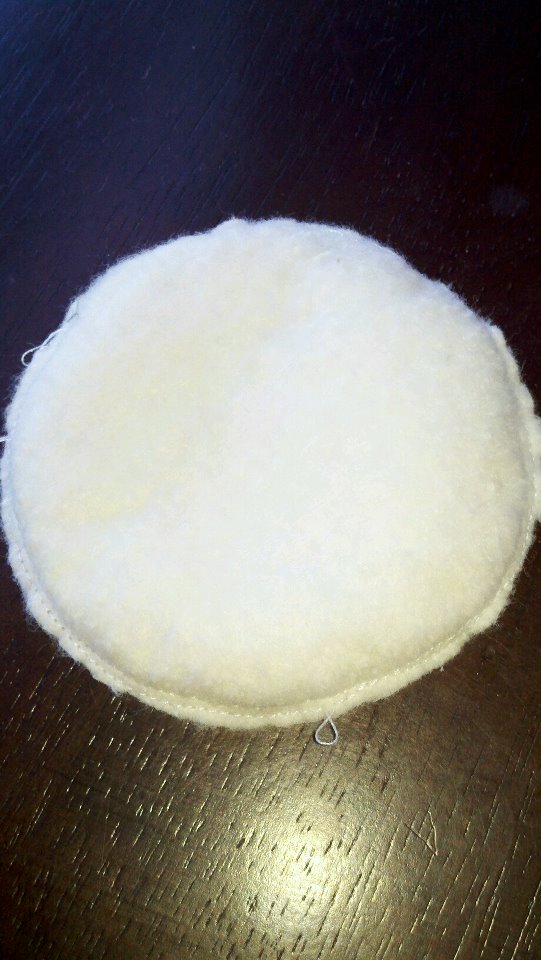
Finished Stack of Doublers
We started cloth diapering our daughter when she was a wee little baby. Our motivation for choosing to cloth diaper was twofold: we wanted to reduce our "waste" and not contribute diapers to a landfill for hundreds of years and second cloth was going to be cheaper for us. We use Flip diapers, prefolds, and doublers and the set up was fairly inexpensive. With the new baby coming and the 20 month old teetering on the edge of potty training we knew we needed more supplies but didn't want to go overboard. Prefolds were cheap to buy more of, the covers I am currently experimenting with making, and I was incredibly pleased with the way my DIY doublers came out.

After researching extensively on materials I determined that most doublers use a cotton batting type "soaking" material on the inside. Be sure to get the quilting style batting which is absorbent but much thinner. You don't want the fluffy pillow-style batting.  After much deliberation I decided to use cotton flannel for the outside layer. Cotton flannel wicks moisture away from the baby and is affordable. Other options are microfleece (make sure you use micro and not regular fleece which "pills" water on it's surface) or a brushed microsuede but fabric for those other two options is pricey. I find that the cotton flannel works perfectly for us. In addition, the doublers I made that are pictured are white but I also found some sale pink polkadot cotton flannel and when I finish that batch our daughter will be peeing in style. Feel free to experiment with colors. 

You will need:
Cotton batting (look for the prepackaged quilt batting- alot of times they go on sale in the spring and you can use a coupon as well- if you purchase by the yard batting is $10.99, I purchased this queen sized batting on sale for $19.99 plus I had a 20% off coupon- the size was roughly 6 yards which means that I spent $2.67/yd)

Cotton Flannel (I purchased a yard for $4.99 plus 20% off= 4.00, a yard will make roughly 10 doublers depending on how you lay out the template.)
Two templates traced on cardboard or paper
Thread

1. The first thing you will need to do is trace the doubler that you wish to replicate onto a sturdy piece of paper. I used an old calendar. Cut this out. This is your batting template. Now trace the doubler again adding about a half inch to the edges. This will be your cotton flannel template. (For the sake of clarity and sanity use a different type of paper so you can tell the two templates apart at a glance.) You'll want to cut the cotton flannel slightly larger than the batting to make it easier to sew the seams, that's why we make two different templates. My doublers were roughly 4" wide by 12" long. 


Cotton Flannel Template & cut piece of cotton flannel
2. Cut all your pieces. You will need two pieces of cotton flannel for each doubler and 3 pieces of cotton batting. It is your choice if you want to add more layers of batting for a thicker doubler but 3 layers replicates a traditional doublers soaking strength. Lay a piece of flannel fuzzy side down on the table and put the 3 batting layers on top. Top it off with a piece of flannel fuzzy side up. (The "wrong" sides of the flannel should be facing the batting.)


3. Sew around the edge of the doubler. I triple seam it and do reverse stitching at the beginning and end of the run to reinforce the seams. You want a strong solid edging because these will be washed frequently. If you had a serger you could serge the edges, however, that is a toy that I don't have yet!


4. Sew a seam down the middle of each doubler to hold all the batting layers together and in place. If you skip this step the doublers will bunch in the wash. 


Trim the edges for a neater look being sure not to cut the stitching. And that's it! You're done. It probably took me less than 7 minutes to sew each doubler. These cost $4.95 each new and in 30 minutes I had made 4 at a cost of roughly .67/each. That is what I call a good investment!

It was almost a little sad how much I beamed with pride over this stack of doublers. Especially considering they are now peed on daily!


4.24.2012

Sweet Potato, Black Bean & Pork Crockpot Stew


At this point in my pregnancy dinners are alternating between quick and fresh (salads, eggs, fruit) and slow cooked meals that are ready at dinner with no effort. Slow cooked meals feel like a bit of a gamble as I prepare them... will we be around for dinner that night? Or will my water break leaving a simmering crockpot meal for whomever picks up our dog to take to their house?

This meal is everything I like in a dinner. It's hearty with chunks of meat- I tend to load my bowl with more veggies while my husband loves the carnivorous elements. It's quick to prepare and it's cheap. Pork stew meat runs around $1.49/lb in our local grocery stores and I managed to snag a pack that was .50 off. Topped off with some lime spiked sour cream it was a hit with everyone in our family.

Sweet Potato, Black Bean & Pork Crockpot Stew (total cost for recipe is $5.25 or .88/serving)
(serves 6)

1 1/2 pounds pork stew meat (2.19- .50 coupon= 1.69)
1 1/2 pounds sweet potatoes (.99/lb = 1.49)
1 15.25 oz can black beans (.89)
1 28 oz can diced tomatoes (.95)
1/2 cup orange juice or the juice of 1 orange (estimate .23 cents cost)
2 cloves garlic
1/2 teaspoon onion powder
1 teaspoon cumin
1 teaspoon salt
1/2 teaspoon pepper
1 teaspoon dried cilantro
Top with: sour cream, lime & parsley (optional)

Gather your ingredients by the slow cooker. Use a garlic press or mince the garlic and add it into the cooker. Peel and dice the sweet potato and add that into the cooker.

Add the pork in on top of the sweet potatoes. 

Dump in the can of beans and the can of tomatoes. 

Pour the orange juice over the top. 

Add all spices and set the slow cooker to start. I cooked on high for 4 hours but you could also do low for 8 hours. 

When the time is up on the slow cooker and you're ready for dinner you can create a quick lime sour cream topping for your stew. I mixed a couple of spoonfuls of sour cream with the juice from a lime wedge and some lime zest and set a dollop on top of each bowl along with a lime wedge. I also sprinkled some fresh parsley on top since I had some on hand. Toppings are optional. Enjoy!

4.23.2012

Baby's Best Friend

I grew up in a pet-free household. Unless you count some outdoor rabbits that lived in a hutch across the yard and the occasional goldfish my mother did not believe in indoor pets. This meant that by the time I left the house all I wanted was a pet.
I had one mini dachsund who was the love of my life but a cross country move to a small apartment sadly left her rehomed. After my husband and I married we started counting down the days until we moved out of our condo and got a house. My husband had grown up with dogs around and is the type of bleeding heart dog lover who walks into a shelter and wants to bring them all home. During our dog-free condo time we adopted a gigantic rabbit named Zeus who thinks he's a dog. He has many strange habits including an affinity for eating meat.
The rabbit sneaks a bite of a quarter pounder. We also can't leave the dog food on the floor because he eats it.

He likes to keep me company while I work by napping on the bottom shelf of my desk.


Once we bought a house and bought a truck the dog was the next natural addition. Among our criteria a patient dog who would be friendly but intimidating to intruders and no hounds who would attempt to eat the rabbit. My 6 year old and I went to the shelter and fell in love with a boxer mastiff mix who was patiently allowing all his brothers and sisters to climb all over him with no complaints. Our daughter was 6 months old at the time and doesn't remember life without her furry brother. Sometimes I think he's her favorite family member. 
(Yes this is a shameless ploy to share adorable pictures.)

Walks in our woods.

He even got along with the rabbit. 

Her favorite person to kiss.... even when she refuses to hug the rest of us the dog always gets love.

They're starting to share facial expressions. 

He cuddled her through the chicken pox. 

After a morning of terrrorizing mommy the partners in crime take a nap break.

As someone who didn't grow up with a dog I don't fully understand the bond that my daughter and her dog share but I'm so happy that they have each other. :)


4.17.2012

Eggplant Gnocchi with Eggplant Tomato Sauce


I love gnocchi. I am also a lucky woman. My husband and kids will eat anything but I love finding ways to "hide" vegetables for their friends. This gnocchi is the perfect vehicle for hidden vegetables. What child would imagine that lurking in the harmless looking pasta is an entire roasted eggplant? The sauce is a great complement to the gnocchi but could easily be replace with standard spaghetti sauce for the picky eaters in the crowd. This is also a great dish to make if you have vegetarians or vegans coming to dinner. One easy egg substitution and the meal is vegan. I am going to refer you to the photos & steps on my previous gnocchi blog post for techniques & pictorials on how to form and roll out gnocchi. 

Eggplant Gnocchi
(serves 4-6)

1 large eggplant (You will toss it with 1 TBS oil & 1 tsp kosher salt)
1 egg (you can easily make this recipe vegan by using an egg substitute product)
1 tsp kosher salt
1 1/4 cups flour plus an additional 1/2 cup- 3/4 cup for rolling out
1 tsp thyme

Eggplant Tomato Sauce
(serves 4-6)

1 large eggplant (You will toss it with 1 TBS oil & 1 tsp kosher salt)
1/2 26 oz can diced tomato (or replace with fresh diced tomato if it's in season in your area)
1 garlic clove, minced
2 TBS olive oil
1/4 cup balsamic vinegar
1 tsp kosher salt
1/2 tsp pepper
1/2 tsp thyme
zest of one lemon
juice from one lemon

1. Preheat oven to 450. Chop the ends off of the eggplants (you'll be using two if making the gnocchi and the sauce). Peel it and slice it into rounds. Stack the rounds and cube up the eggplant. Throw it into a bowl and toss with 1 TBS olive oil and 1 tsp of kosher salt for each eggplant you're using. 


Spread the eggplant on a cookie sheet and roast in the oven for roughly 15-20 minutes until soft. Watch for burning pieces. 


2. When the eggplant is done roasting place half of it into the food processor, reserving the other half for the sauce. Add an egg, 1 tsp of kosher salt, 1 tsp thyme & 1 /14 cups of flour into the processor and blend until smooth. It will look like a dip. Feel free to add an extra 1/4 cup of flour if it feels too goopy. 


Turn out the batter a few spoonfuls at a time onto your prepared floured surface to roll out the gnocchi into long strands (for pictures see my earlier gnocchi blog). As you cut up the gnocchi make sure to place it onto a floured cookie sheet. Once all gnocchi is cut place it into the fridge for 15 minutes to set. 

3. Start a large stockpot of water on the stove so it will boil in time to cook the gnocchi. Now it's time to start your sauce. In a saute pan place a tablespoon of olive oil and dump in the remaining eggplant. Use a spatula to move around the eggplant and heat it back up. Add 1/4 cup of balsamic vinegar and mix to coat. 

Add in minced garlic and saute for 3 minutes. Add in the diced tomatoes and 1 TBS of olive oil. Use your tongs to combine the eggplant and tomato. 


4. By this point roughly 10- 15 minutes should have passed. Add the eggplant gnocchi that was resting in the fridge into the pot of boiling water. Add the lemon zest, lemon juice, salt, pepper, and thyme into the sauce. The gnocchi need to boil for a little under 5 minutes and will float to the surface when done. Scoop onto plates and top with your sauce. Enjoy!


4.15.2012

How to Make Absorbent Breast Pads


As a soon-to-be third time mother I'm in the depths of baby prep. With a 20 month old running around we have many of the items on hand that I need but I've been making a little list of "things to do" and make before baby comes. Breast pads were one of them. They also make great homemade baby shower gifts for expectant mothers. I made some for a friend as well and I thought they looked quite cute all packaged up in a little drawstring bag.


If you read my blog regularly you may have figured out by now that I like finding multiple ways to use things and ways to do things the cheapest. I made a baby quilt for a friend's baby shower (tutorial coming soon!) and lucked out on some queen size cotton batting sheets for 19.99 at Joann Fabrics (regularly 39.99). Plus I had a 20% off coupon. They contained roughly 6 yards of batting which broke down the cost to 3.33 a yard (2.67/yd including the 20% off) versus the normal by the yard cost of 10.99. They were also all-natural which was great. I grabbed two figuring they'd be great to have on hand and they also fit another project I was working on - doublers for cloth diapers. After finishing the baby quilt I had stacks of 4" squares left that I had cut (mental note- you only need half as many quilt squares as patterned squares :) ). They were the perfect size to make reusable breast pads that would fit into a bra for nursing mothers. Cotton tends to be the choice for reusable pads that you can buy in the store as well. I prefer the reusable pads over the disposable one because the plastic lining in the disposable pads is sometimes thought to contribute to excess moisture leading to chapping and thrush. 

Each set of pads probably took me less than ten minutes. Here's how I did it:

1. Cut 2-3 squares of quilting batting (100% cotton) or use leftover squares. You'll be stacking the batting squares to form the soaking pad so it is a matter of personal preference on how many to use. I used two layers since the batting was nice and thick. 

Square of batting
Find something circular to trace for the pad (or steal your kids compass). I used a Chinet plastic cup. The top had a diameter that took up almost the whole 4" square. Keep in mind that these will shrink a little bit when you wash them the first time so make them a bit bigger than you think you'll need.

Trace around the circular object. I've got two squares under this cup.

I traced with a sharpie. It washed off the first time I washed it since most of the color stays on the fuzzy surface of the batting.
2. On your sewing machine sew with a thin stitching around the circle. You want a total of two "laps" so I just go around the circle twice without stopping. Be sure to do a reverse stitch at the beginning and end which will help strengthen your seams. Sewing in a circle shape can be a bit tricky for beginners so go slowly. The nice added benefit of sewing a circle is that it helps the fabric form a little cup which makes them sit in your bra really smoothly.

Make sure that you have however many squares you'll be using stacked together when you sew. If you seam them individually you'll have to sew them all together later which is a pain. 

Use scissors to cut around the seaming and remove all the excess square fabric.

You'll be left with a nice circular pad.
3. To prevent bunching when you machine wash them you'll want to sew a big "X" on the pad to hold the layers of batting together. I just ran a quick seam horizontally and one vertically. Tie of the threads at the end and snip excess.


Voila! A stash of soaker pads. Each set of two took less than 10 minutes to make so you could churn out a bunch fairly quickly. I washed these with my daughter's clothes and they "compacted" a tiny bit but didn't shrink significantly. 

Two sets of breast pads. Package them in a cute drawstring bag for a great baby shower gift. 
I estimate the cost of two sets to be under a dollar to make, as it used far less than a yard of batting ($3.33/yd). The final cost will vary based on the batting that you purchase. I strongly suggest checking out full quilt batting at this time of year as they usually go on sale at the start of warmer seasons. You can also pretty these up a bit if you want by including a layer of printed or colored flannel on the outside. It will wick moisture away and provide a little "personality".

Happy Sewing! 

(Please link back to my blog to share the tutorial- or contact me at ramblingstump (at) gmail.com for permission to post the full tutorial on your blog with a link back.)


4.12.2012

Make Your Own Crackers


If you have never made your own crackers you have no idea what you're missing! The recipe is easy, the procedures are straightforward, you just need the time to roll out the dough and bake the batches. The end result is delicious. I first made crackers for my husband to bring to an office Christmas party and now they're a favorite snack in our house and tend to disappear quickly.

Homemade Crackers
(Makes 20 dozen-ish, it's hard to get an accurate count as my husband was eating them off the cooling rack. Yield will also depend on size of cracker you make.)

6 cups flour
2 cups warm water
2/3 cup olive oil
2 teaspoons kosher salt
Any additional add on ingredients you'd like (I split my dough into three batches- the 1st batch were plain or had mixed seeds-fennel, poppy, and sesame- on top, the second batch had 1 tsp thyme & 1/2 tsp ground rosemary, and the third batch were spicy with 2 tsp of hot pepper flakes.)

1. In a mixer with the dough hook attachment measure out olive oil and add salt. Add warm water and add flour a few cups at a time mixing in between.


It will yield a large ball of slightly sticky dough. It won't look like a lot but it rolls out nicely.
2. Turn out a manageable ball onto a flour covered surface. The great thing about working with olive oil dough is that as it absorbs the extra flour from the counter it becomes very easy to work with. Flip it a few times to get flour on all sides. You want to roll it out thinly with a rolling pin. It will feel elastic-y almost like a pizza dough so you'll have to push hard. I'm short so I stand on a step stool to get a little leverage to push down. To prevent your crackers from sticking flip the dough one last time before you cut out the shapes. I use a biscuit cutter that is a 1" square to make roughly Triscuit sized crackers, I also have a slightly smaller square that I use sometimes to make Wheat Thin sized crackers. 

Make sure to have plenty of flour on your counter!

Push down really hard when you roll out the dough. The crackers puff a bit in the oven so you wan them thin. 

Cut squares. (or the shape of your desire)
Once your squares are cut out, transfer them to a foil lined cookie sheet sprayed with a tiny bit of cooking oil. You want to use a fork to poke at least a few holes in each cracker, otherwise they puff up in the oven while cooking. They still taste delicious when they puff it's just easier to put cheese on them if they're flat :) Bake in the oven for 8-10 minutes per batch. I can usually fit 30 on each tray. When they come out you can either cool them on a cookie rack or just dump them into a large mixing bowl to cool and to store. Repeat multiple times until all crackers are baked. 

See the tiny little poked holes? Very important detail!

My 8  month pregnant belly became a flour covered disaster during this cooking project!

Cooling plain crackers.

Varieties: Your flavor options are only limited by your imagination. One of the reasons that I do different flavors is that the dough is easier to work with when it is freshly mixed so as I add spices and remix the dough it becomes easier to work with. If you're going to make all plain ones I recommend keeping the extra dough in the bowl and mixing it occasionally to maintain it's workability. 

A mix of fennel, poppy, and sesame seeds.

Sprinkle a bit on each cracker and give each surface a light press with your fingers to make sure the seeds stay on the cracker. 

Another option is to mix add ins directly into the dough. This is how I make my rosemary-thyme crackers and my hot pepper crackers. 
Enjoy! This recipe offers a great opportunity for kids to help out and you can certainly make all kinds of fun shapes for them.