Pages

Showing posts with label farm. Show all posts

10.11.2012

Apple Curry Squash Soup

Autumn is here in Vermont. Actually, technically it's practically over. Peak foliage has passed. Leaves are on the ground and snow has already hit the mountain tops. Which means it is prime soup weather. I love soup. A bowl of it with slices of homemade bread is one of my very favorite lunches.

I also love to can. There is something about hoarding mason jars that makes me really happy. As I follow USDA regulations I don't can anything with dairy so the two soups I made this week are all vegan and very healthy as I also didn't use any oil.


You will need:

2 lbs (about 2 cups) roasted butternut squash (Check out my post on easily roasting a squash whole.)
1 lb of apples, sectioned but not peeled (Macintosh or another squishy saucing apple works best)
1/2 cup sliced red onions
1 clove garlic, minced
1/4 cup apple cider vinegar
1 1/2 tsp kosher salt
1/2 tsp black pepper
1 TBS curry powder
6 cups vegetarian stock (I use a Vegetarian "Chicken" Flavored powder, 1 tsp per cup)

Chop apples leaving the skins on. Slice onions and mince garlic. Put it all into a stockpot and saute using the cider vinegar. (If you wanted to you could substitute in a little oil here.) The apples will start getting a little squishy. This means you are ready to puree.

Puree the apples, onions, and garlic. Add 1 1/2 tsp of salt and 1/2 tsp pepper to the puree and mix. 
Return the puree to the pan and heat.

Add the 6 cups of stock into the apple puree. 

Puree 2 cups of squash until smooth and add to the pan. Stir in well.  
Add curry into pan and mix in. 
Simmer the soup over low until slightly reduced for about 20 minutes. Taste and add salt if necessary (curry usually has salt in it so I always undersalt then taste it to avoid a salt-tastrophe!). 

If you're serving it right away then dish it out and enjoy with some bread!

If you're canning it make sure to use clean, hot sterilized jars. Fill the jars leaving about 3/4" of headspace. Wipe the rim and threads and top with clean sterilized NEW lids and a clean ring tightened (but not cranked on too tight). The soup will need to be pressure canned at 11 lbs of pressure (I do 15 since I have a weighted canner) for 55 minutes. Store for up to a year to enjoy on cold winter days.


7.18.2012

Hidden Veggies Beet Spaghetti Sauce

beet recipes, beet spaghetti, csa recipes, quick dinners

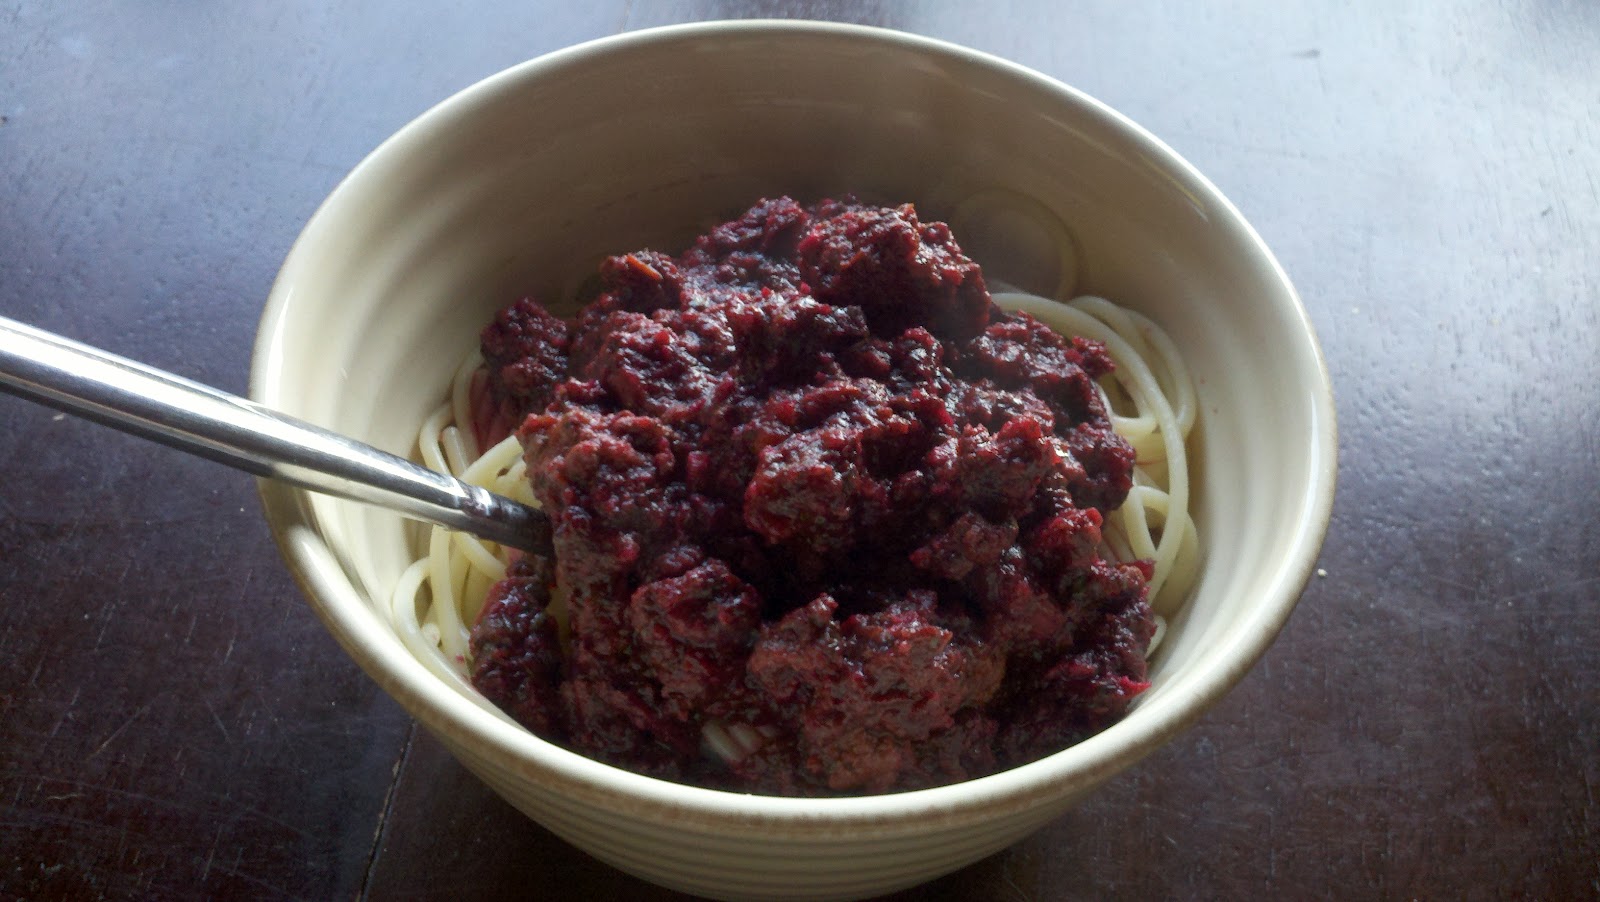
Think your kids won't eat beets? We kept getting them in the CSA basket and I was determined to do something with them that was different. Beet recipes so often gear towards roasting and I wanted to put them into something that was already a hit in our house. Success! My son had seconds, my daughter loved the purple color and I loved that there was a pound of veggies crammed into the sauce. This recipe pulls double duty because you can use leftovers over mashed potatoes or as a sloppy joe filling.


Hidden Veggies Beet Spaghetti Sauce
(serves 6-8; great for leftovers)

1 lb ground beef
6-8 oz mushrooms
4 oz spinach
1 oz arugula (optional- I love the peppery bite it gives the sauce)
6 oz beets, tops & roots removed (no need to peel)
1 can plain tomato sauce
1/2 tsp garlic powder

1. Brown ground beef in a saucepan. Drain off the fat. While the beef is browning de-stem and slice the mushrooms.

2. Add mushrooms to the ground beef. 


3. Measure out 4 oz spinach, 1 oz arugula and 6 oz beets (roughly one small bunch). 


Chop them all up in the food processor. 


4. Add the veggies to the ground beef and mushrooms. Add a can of traditional spaghetti sauce (I use generic Hannaford's brand 95 cent sauce). Stir to combine. Add garlic powder and heat through.


5. Serve sauce over noodles, potatoes or as the filling for sloppy joes. Enjoy!


6.16.2012

Refrigerator Radish Dill Pickles

Radish Dill Pickles

Early in the CSA season there are an abundance of radishes and greens to use. We eat salads nonstop and even experiment a little. My husband was NOT a fan of the mustard green juice I made :)

The ginger juice did not exactly get a "Woo-hoo" response either. 

Radish dill pickles are a new item to my lineup this year but this is now the third batch I've made. They are super simple to make as they are just refrigerator pickles. This means that I don't process them in any way- no hot water bath, no pressure canning- just good old-fashioned vinegar. I'm going to run through the steps but there will be no exact measurements. If you follow the proportions you'll be able to do this with any quantity of radishes. I had a mixing bowl full and it made 3 pint jars and one small canning jar of pickles.

You will need:
Canning jars, bands & caps
Radishes
Fresh Dill
Kosher Salt
Water
Vinegar- I use white

Soak your radishes in water for 5 minutes to remove any loose debris. Agitate the water with your hand to get dirt off of them. Dump the water and carry the bowl over to your cutting board.


Chop the roots and tops off of the radishes and halve or quarter them depending on their size. I keep a little bowl nearby to put the ends in so I can run them to the compost easily.


If you see any black spots on the outside just slice them off. If the spot is on the inside too discard the radish.


Bring the radishes back over to the sink in the bowl and give them one more rinse. Then pack them into your jars. You want to leave about 3/4" at the top for the dill. Wash your dill and take stalks of it off. Curl them into the top of the jar over the radishes. 


Pour vinegar through the dill until the jars are halfway full. 


Sprinkle about 1 teaspoon of kosher salt on the top of each jar. Fill the jars the rest of the way with water.


I top off the dill at this point. I want a lot of dill flavor so I cram as much as I can fit in there. Once your done cap and band the jars. 


Turn them upside down for about an hour on the countertop so that the dill infuses into the vinegar. After an hour put them into the fridge.


Within an hour of making them the pickles will start turning pink. I try to leave them in the fridge for at least a week before we open them to eat. They keep 3-6 months in the fridge. As a fair warning, radishes make stinky pickles. They taste delicious but they are smelly. 

6.04.2012

CSA Cooking

photo courtesy of Hatch Brook Gardens


This week kicks off the CSA season for us. What, you might ask, is a CSA? Community Supported Agriculture is a partnership between the consumer and the farmer. In this venture you pre-pay for a share of vegetables. This money allows the farmer to plan for their season and purchase needed items. You are taking a risk together with the farmer. If the growing season is overly abundant you share in that abundance. If a rainy season wipes out the tomato crop then you get no tomatoes. Usually the farm sponsors a weekly pickup.

We are members of a CSA called Hatch Brook Gardens located in Hyde Park VT. Last year was their first growing season. We were psyched to support a couple of young farmers and our faith was well placed. I loved their free-choice concept. This meant that we could choose what we wanted from the spread each week and take what we would use during the week. In addition, they offer work days and pot lucks so that we can really participate in the experience.

Once our CSA launches my grocery bill plummets. We eat a vegetable heavy diet during the summer and I love the challenge of cooking everything that our farmers grow. Watch for some fun recipes and canning suggestions.

If you live in the Lamoille Valley area of Vermont feel free to check out Hatch Brook Gardens website and reach out to them. They currently have about 10 shares left for the season. You won't be disappointed!