Pages

Showing posts with label DIY. Show all posts

4.28.2012

DIY Cloth Diaper Doublers (AKA "Soakers")


Finished Stack of Doublers
We started cloth diapering our daughter when she was a wee little baby. Our motivation for choosing to cloth diaper was twofold: we wanted to reduce our "waste" and not contribute diapers to a landfill for hundreds of years and second cloth was going to be cheaper for us. We use Flip diapers, prefolds, and doublers and the set up was fairly inexpensive. With the new baby coming and the 20 month old teetering on the edge of potty training we knew we needed more supplies but didn't want to go overboard. Prefolds were cheap to buy more of, the covers I am currently experimenting with making, and I was incredibly pleased with the way my DIY doublers came out.

After researching extensively on materials I determined that most doublers use a cotton batting type "soaking" material on the inside. Be sure to get the quilting style batting which is absorbent but much thinner. You don't want the fluffy pillow-style batting.  After much deliberation I decided to use cotton flannel for the outside layer. Cotton flannel wicks moisture away from the baby and is affordable. Other options are microfleece (make sure you use micro and not regular fleece which "pills" water on it's surface) or a brushed microsuede but fabric for those other two options is pricey. I find that the cotton flannel works perfectly for us. In addition, the doublers I made that are pictured are white but I also found some sale pink polkadot cotton flannel and when I finish that batch our daughter will be peeing in style. Feel free to experiment with colors. 

You will need:
Cotton batting (look for the prepackaged quilt batting- alot of times they go on sale in the spring and you can use a coupon as well- if you purchase by the yard batting is $10.99, I purchased this queen sized batting on sale for $19.99 plus I had a 20% off coupon- the size was roughly 6 yards which means that I spent $2.67/yd)

Cotton Flannel (I purchased a yard for $4.99 plus 20% off= 4.00, a yard will make roughly 10 doublers depending on how you lay out the template.)
Two templates traced on cardboard or paper
Thread

1. The first thing you will need to do is trace the doubler that you wish to replicate onto a sturdy piece of paper. I used an old calendar. Cut this out. This is your batting template. Now trace the doubler again adding about a half inch to the edges. This will be your cotton flannel template. (For the sake of clarity and sanity use a different type of paper so you can tell the two templates apart at a glance.) You'll want to cut the cotton flannel slightly larger than the batting to make it easier to sew the seams, that's why we make two different templates. My doublers were roughly 4" wide by 12" long. 


Cotton Flannel Template & cut piece of cotton flannel
2. Cut all your pieces. You will need two pieces of cotton flannel for each doubler and 3 pieces of cotton batting. It is your choice if you want to add more layers of batting for a thicker doubler but 3 layers replicates a traditional doublers soaking strength. Lay a piece of flannel fuzzy side down on the table and put the 3 batting layers on top. Top it off with a piece of flannel fuzzy side up. (The "wrong" sides of the flannel should be facing the batting.)


3. Sew around the edge of the doubler. I triple seam it and do reverse stitching at the beginning and end of the run to reinforce the seams. You want a strong solid edging because these will be washed frequently. If you had a serger you could serge the edges, however, that is a toy that I don't have yet!


4. Sew a seam down the middle of each doubler to hold all the batting layers together and in place. If you skip this step the doublers will bunch in the wash. 


Trim the edges for a neater look being sure not to cut the stitching. And that's it! You're done. It probably took me less than 7 minutes to sew each doubler. These cost $4.95 each new and in 30 minutes I had made 4 at a cost of roughly .67/each. That is what I call a good investment!

It was almost a little sad how much I beamed with pride over this stack of doublers. Especially considering they are now peed on daily!


4.15.2012

How to Make Absorbent Breast Pads


As a soon-to-be third time mother I'm in the depths of baby prep. With a 20 month old running around we have many of the items on hand that I need but I've been making a little list of "things to do" and make before baby comes. Breast pads were one of them. They also make great homemade baby shower gifts for expectant mothers. I made some for a friend as well and I thought they looked quite cute all packaged up in a little drawstring bag.


If you read my blog regularly you may have figured out by now that I like finding multiple ways to use things and ways to do things the cheapest. I made a baby quilt for a friend's baby shower (tutorial coming soon!) and lucked out on some queen size cotton batting sheets for 19.99 at Joann Fabrics (regularly 39.99). Plus I had a 20% off coupon. They contained roughly 6 yards of batting which broke down the cost to 3.33 a yard (2.67/yd including the 20% off) versus the normal by the yard cost of 10.99. They were also all-natural which was great. I grabbed two figuring they'd be great to have on hand and they also fit another project I was working on - doublers for cloth diapers. After finishing the baby quilt I had stacks of 4" squares left that I had cut (mental note- you only need half as many quilt squares as patterned squares :) ). They were the perfect size to make reusable breast pads that would fit into a bra for nursing mothers. Cotton tends to be the choice for reusable pads that you can buy in the store as well. I prefer the reusable pads over the disposable one because the plastic lining in the disposable pads is sometimes thought to contribute to excess moisture leading to chapping and thrush. 

Each set of pads probably took me less than ten minutes. Here's how I did it:

1. Cut 2-3 squares of quilting batting (100% cotton) or use leftover squares. You'll be stacking the batting squares to form the soaking pad so it is a matter of personal preference on how many to use. I used two layers since the batting was nice and thick. 

Square of batting
Find something circular to trace for the pad (or steal your kids compass). I used a Chinet plastic cup. The top had a diameter that took up almost the whole 4" square. Keep in mind that these will shrink a little bit when you wash them the first time so make them a bit bigger than you think you'll need.

Trace around the circular object. I've got two squares under this cup.

I traced with a sharpie. It washed off the first time I washed it since most of the color stays on the fuzzy surface of the batting.
2. On your sewing machine sew with a thin stitching around the circle. You want a total of two "laps" so I just go around the circle twice without stopping. Be sure to do a reverse stitch at the beginning and end which will help strengthen your seams. Sewing in a circle shape can be a bit tricky for beginners so go slowly. The nice added benefit of sewing a circle is that it helps the fabric form a little cup which makes them sit in your bra really smoothly.

Make sure that you have however many squares you'll be using stacked together when you sew. If you seam them individually you'll have to sew them all together later which is a pain. 

Use scissors to cut around the seaming and remove all the excess square fabric.

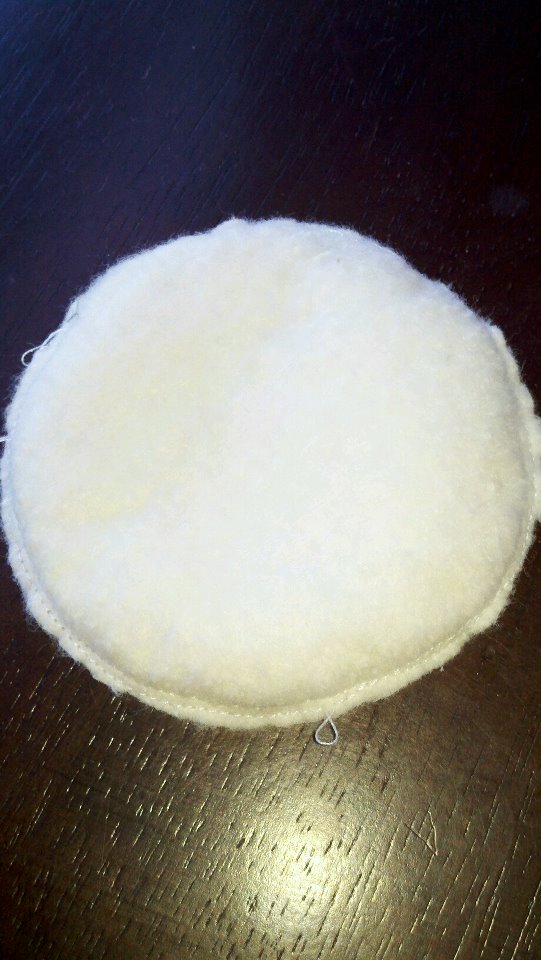
You'll be left with a nice circular pad.
3. To prevent bunching when you machine wash them you'll want to sew a big "X" on the pad to hold the layers of batting together. I just ran a quick seam horizontally and one vertically. Tie of the threads at the end and snip excess.


Voila! A stash of soaker pads. Each set of two took less than 10 minutes to make so you could churn out a bunch fairly quickly. I washed these with my daughter's clothes and they "compacted" a tiny bit but didn't shrink significantly. 

Two sets of breast pads. Package them in a cute drawstring bag for a great baby shower gift. 
I estimate the cost of two sets to be under a dollar to make, as it used far less than a yard of batting ($3.33/yd). The final cost will vary based on the batting that you purchase. I strongly suggest checking out full quilt batting at this time of year as they usually go on sale at the start of warmer seasons. You can also pretty these up a bit if you want by including a layer of printed or colored flannel on the outside. It will wick moisture away and provide a little "personality".

Happy Sewing! 

(Please link back to my blog to share the tutorial- or contact me at ramblingstump (at) gmail.com for permission to post the full tutorial on your blog with a link back.)


4.06.2012

Homemade Dishwasher Powder & Homemade Laundry Detergent


If you read my blog regularly you've probably figured out that I'm cheap and that I don't think cheap is a dirty word. I'm proud to be cheap. I cut corners where I can so that we can put money in our savings account and take vacations. Also, having a bicoastal shared custody 8 year old becomes expensive. Plane tickets go up every day and the reality is that every flight is $200 more roundtrip if you have to pay an unaccompanied minor fee. Also, in general I like knowing what goes into all of my cleaning products. No mystery gels with "super power blaster beads" for me.
Awhile ago I started making my own laundry detergent. I realized soon after that most of the ingredients could also be used to make dishwasher powder and since I already planned on buying some citric acid for bath fizzies it was a double win. I'm putting these in the same post because I tend to try to make both at the same time so that I can determine whether ingredients need to be restocked.

Homemade Laundry Detergent  (batch costs 1.38= .05/load)
(makes roughly 30 oz)

You will need:
A container for the finished detergent
A box grater

1 cup borax 76 oz box is $4 at my grocery store, .05/oz, 8 oz used= .40
1 cup washing soda 55 oz box is $3.50 at my grocery store, .06/oz, 8 oz used= .48
1 bar Ivory soap (I buy 10/pks when they're on sale for $5 or less- .50/bar) .50

1. Gather ingredients.

2. Find a bored 8 year old to grate your soap. 


Fluffy grated soap. It comes out to about a cup and a half.

3. Add your other ingredients.

1 cup borax & 1 cup washing soda
Use a spoon to squash all the clumps out.


Transfer to your container. Mine is an old Charlies Soap Powder Container.


Shake it up to mix, or find a willing kid. 


Label & store. 

I have a scoop in mine that is a .5oz scoop- so one scoop per load. 


Homemade Dishwasher Powder (cost per batch $3.14- 4.50 depending on water hardness)
(makes roughly 28 oz)

You will need:
A quart size glass jar with a rubber seal - washed out and completely 100% dry
1 cup borax 76 oz box is $4 at my grocery store, .05/oz, 8 oz used= .40
1 cup washing soda 55 oz box is $3.50 at my grocery store, .06/oz, 8 oz used= .48
1/2- 1 c citric acid (use 1 c for hard water) 5 lb tub is $27.14/80oz=  recipe uses 4-8oz-  $1.36-$2.72
1/2 cup kosher salt $3.50 for a 16 oz box- 4 oz used= .90
A container to measure into
A measuring cup
A plastic spoon

1. Gather your ingredients.


2. In your tupperware container mix all of the ingredients- 1/2 cup- 1 cup citric acid (depending on water hardness), 1 cup borax, 1 cup washing soda, and 1/2 cup kosher salt.  It's fairly easy to find borax, washing soda and salt at the grocery store. I purchased my citric acid online. You can find it in stores in small quantities but it's far more cost effective to purchase it in larger quantities through Amazon. 

I use a plastic cup to measure everything. It's a 9oz glass so I fill it close to the top. 

Adding the kosher salt.
After I add all the ingredients into the tupperware I use a plastic spoon to squash any lumps in the powder. Sometimes the borax clumps in the box a bit and I want to make sure that everything mixes evenly. 

3. Transfer the powder to an airtight jar. It is super important that the jar is completely dry. Citric acid clumps if the least little bit of moisture is introduced- your powder will then harden and you will be using a butter knife to chip it out bit by bit (and then if you're me your husband will question whether it is really worth it to make your own dish powder). One trick I have found that works is to put a packet of silica gel (it comes in new shoes) into the container. If you use a needle and thread you can thread through the packet and twist the thread around the hinge on the jar so that the silica hangs above the powder and there's no chance you accidentally dose it into your dishwasher!


The scoop I use is a .5 oz scoop (tablespoon). This means that each load I run costs me .16 (it will be less if you don't have hard water). I also put a bit of vinegar into the rinse aid section of the dishwasher. A tablespoon or so per batch helps make sure the dishes don't cloud. Happy washing!


2.26.2012

Homemade Dog Treats


Disclaimer: This recipe is the perfect excuse for me to go overboard with self-serving adorable pictures of my dog. Be warned- he's got the puppy dog eyes down!

I love my dog. He's a boxer mastiff mix that we got from North Country Animal League when he was 3 months old. My son's birthday is a week before my and my husband's (yes we have the same birthday) so he was a group birthday present.

He used to be little.
Not anymore!


Griffin lives a life of luxury. He naps, he goes for rides in the truck, he sleeps in the bed, he runs giant circles through freshly fallen snow in our yard, basically his life is a cakewalk. Except for one factor- our toddler. She loves Griffin, and sometimes she shows that love in a rough in your face kind of way. He takes it all in stride and just deals with it.

They're best buds. They even share facial expressions.

Cuddle buddies.
He loves the kids- even when my son inexplicably thinks they should go sit in the cage together.


So he deserves treats. For some reason he doesn't like store bought bones. We go to the dump and they give him a Milkbone. He takes it into his mouth and sits with it, but never eats it. Strange dog. Homemade treats though? A whole new story. He begs for these.

Homemade Dog Treats
(makes roughly 6 dozen) The whole batch only costs $1.50 to make, that's only .25/dozen!

2 medium overripe bananas (3 small- I had 3 small ones on hand this time, .60/lb roughly 1/2 lb) .30
1 1/2 cup oatmeal (will be put in at two different times- I buy in bulk & it costs me .20/cup) .30
3 cups of flour (if I have whole wheat on hand I use half white half wheat- I buy white flour in bulk & the final cost-out is .13/cup) .39
1 cup broth (I use chicken broth, you can use vegetable broth for vegan treats. Make sure your broth doesn't have onion powder in it as it can be dangerous for dogs. I buy powdered broth in bulk) .15
1/2 cup peanut butter (64 oz is 5.65, .09/oz) .36

1. Preheat oven to 350. Locate some squashy bananas, the type you'd make banana bread out of. I have also successfully used homemade applesauce or extra baked sweet potatoes instead of banana. Puree them in the food processor.


2. Add 1 cup of oatmeal into the blender with the banana puree. Pulse so that the oatmeal is pulverized. 


Add in the peanut butter. It should be roughly half a cup, I just stick in two big spoonfuls because it's easier than measuring it out and scraping it out of the cup. Blend.


Add in the 1 cup of broth and 1 cup of the flour. 


Pulse to mix, then add in 1 more cup of flour. Blend until it looks like hummus. 

Looks like hummus to me.

3. The mix will be really sticky at this point. Add in the rest of the oatmeal (1/2 cup) and 1 more 1/2 cup of flour (you'll have 1/2 cup left).

4. Flour an area on your counter. I use a spatula to take a large dollop out of the processor. Flip it a couple of times to get flour on both sides, shaking off excess. Now pat it out into a large round. I've tried using a rolling pin before but it is typically just easier to use your hands. 


Cut out your shapes. I used a Martha Stewart bone cookie cutter that I picked up at Petsmart and some dinosaur cookie cutters from my husband's childhood. 


Put them on a tinfoil lined cookie sheet that is lightly sprayed with cooking spray.


Bake them at 350 for 14 minutes. If you are using small shapes you'll want to cut the time a little bit because they'll brown faster on the edges. This is a large recipe. To minimize time in the kitchen I use two cookie sheets. While one is in the oven baking I am cutting out shapes and loading up the other one so it is ready to go in. After the first batch is baked my dog starts salivating and comes into the kitchen to hang out. 

My daughter is putting a "blanket" on him. 
5. The treats will look a tiny bit puffy when they come out of the oven. 


Put them on racks to cool. 

Cooling T-Rexes, bones & according to my son's dino book Avaceratops.
Make sure to find a qualified taste tester.


These will keep for roughly 2 weeks in an airtight container. I packaged mine up and brought them to a food swap that I co-hosted. They're always a hit- what can I say, humans like to spoil their dogs :) . 


Enjoy!


2.25.2012

Make Your Own Body Wash


If I knew how easy it was to make my own body wash I would have done it long ago. I'm cheap- "thrifty" if you think cheap's a dirty word. Plus my husband has eczema so simple is best. I started making my own laundry powder and dish detergent long ago so body wash was the next logical evolution. I'll go through the base recipe and also give the "fancy" version that I make for my use. My husband loves Ivory's plain body wash so that's what he got.
When I say "easy" I'm not kidding. I made this in very little time with an 18 month old "helping" me. And we all know how "helpful" toddlers can be. 

Body Wash
Total Cost $4.36 per batch, makes 8 12 oz containers @ .55/each
(Made roughly 48 oz of each type- 96 oz total)

1 gallon distilled water .89
3 bars of Ivory soap (You want roughly 4 cups of grated soap- it'll be a little over with the 3 bars) (I buy a 10 pk at a time since I also use it in laundry powder, I buy when it's on sale & it's $5 or less, 10 bars = .50/bar) $1.50
4 TBSP vegetable glycerin (I got 16 oz on Amazon for $9- .56/oz, 1 TBS=.5 oz, 4 TBS=2 oz) $1.12
15 drops of essential oil if using (.5 oz container is $5, I only used a little bit) .75
1/4 tsp ground rosemary
1/2 cup oatmeal (I buy in bulk, it's .20/cup) .10
6 16 oz jars or 8 12 oz jars (It's a good idea to have an extra jar or two available. Because this recipe involves melting soap and boiling water the yield can be slightly different each time.)
a funnel
a ladle 


1. Split the 1 gallon of distilled water between two pots. Bring to a boil. I do this because I make half the batch plain and half the batch scented. If you're making just one type and have a big enough pot feel free to do it all together.


2. Grate the 3 bars of Ivory Soap. I have a dedicated box grater that I use for grating body wash & laundry soap. I definitely recommend a box grater or your wrist will be hurting by the third bar! It took me less than 10 minutes to grate them all. I have a designated tupperware container that I use to shred into that is also my laundry powder mixing container. My "helper" took the paper off of all the soap. 


I use a plastic cup to measure. It's 9 oz so just a touch over 1 cup.

3. Turn the stovetop down to low. Add two cups of soap and two tablespoons of vegetable glycerin to each pot. 


Stir occasionally. It will take about 15 minutes for all the soap to melt properly. It'll go through three stages.

Shiny and coating the top until it really starts melting.

Then the water will turn cloudy and the pieces that are still melting will clump together. 

Last, a bubbly surface will form. All the soap is melted at this point.
Make sure you keep your helper happy during this process.


4. Get your extra add-ins ready if you're making my "spa-version" in addition to the plain body wash. You'll need to add 1/4 tsp of ground rosemary (or spice of your choice), 15 drops of essential oil & the pulverized oatmeal into one of the pots and stir it well. 


I used lavender, which I love!
Let the mixture simmer for about 3 more minutes and stir often to prevent the oatmeal from sinking and clumping. I pulverize the oatmeal so I can put the wash in a squeeze bottle and it will still come out easily.

5. Turn the heat off. Let everything cool off for roughly 10 minutes. Next, use the ladle and the funnel to transfer the mixtures to their jars to fully cool. Make sure to stir the spa version with the ladle as needed to prevent the oatmeal from settling. I use random jars from condiments for this since they're just holding the wash until you fill up the dispenser of your choice in the shower. 


It's going to look super liquid-y. You'll be shaking your head and thinking I steered you wrong. Don't worry! Just walk away. I leave them for a few hours and go about my day. They thicken as they cool. 

Still liquid-y.
But 8 hours later I went back and ......

It will thicken up, you may even be alarmed by how thick it is. Again, don't worry it's still fine.
6. Time to decant your wash into your dispenser of choice. I put my husband's plain wash into his old Ivory bottle and I put my fancy wash into a squeeze bottle. Just shake the jar over the funnel. The wash will be a little jiggly and gelatinous. It is best kept in a bottle you can shake before using. I use a chopstick to "help" the wash through the funnel and into the squeeze bottle.
Now go take a luxurious spa-like shower and enjoy!