The 9th month of pregnancy. A time when every moment feels like it could be my "last" pre-baby. Every time I leave the house I feel like I may not be the next one back into it. Go bags are packed. Dinners are made in crockpots and simmered all day- I even leave tupperware next to the pot in case we aren't the ones to get to it for dinner!
My husband is of the "caveman" variety. He does best with a hearty dinner. He is a champ at being a dad and getting up in the middle of the night when the cries roll in but his mood suffers if there is not a big meal in his stomach. Enter the freezer burrito. We don't buy a lot of prepared food at all. In fact, I don't know the last time I purchased a TV dinner or frozen meal. Unless you count tater tots, which we all have a weakness for. I love the idea of frozen burritos but if you just look at the the labels on the store bought they're horrifyingly bad for you. Early in my employment history I worked my way through several restaurants and learned the art of the kitchen assembly line. Freezer burritos take me a little less than an hour to make and when you're starving and don't feel like cooking you'll be glad you have them.
 |
| Just looking in the freezer and seeing the waiting "quick meal" freezer burritos I feel more at ease about the baby coming. |
I'm listing the recipe here just for reference and pricing but realistically you can make numerous changes to these and adapt them to your taste. I use both rice and beans in the burritos to make them a heavier meal substitute. The salsa is optional but I highly recommend it because as the burrito microwaves it "hydrates" the burrito and adds a nice moisture.
Beef, Bean & Rice Freezer Burritos ($10.24 for the whole recipe- $1.02/burrito- equivalent to most grocery "convenience" burritos but much healthier)
2 lbs ground beef (Mine was $2.69/lb plus a $1.50 off end of shelf life coupon) $3.88
1 packet taco seasoning .59
12 oz salsa (24 oz can 2.69) $1.35
6 oz block of cheese shredded (I buy a 32 oz block for $8.49) $1.62
1/2 15 oz can of black beans (I save the other half for another recipe- can is .89) .45
1 bag of Success Boil in Bag Rice (6/$3.98) .66
10 White Flour Tortillas (I used Ortega) $1.69
10 tinfoil squares
10 plastic wrap squares
1. Brown the ground beef according to your taco seasoning directions.
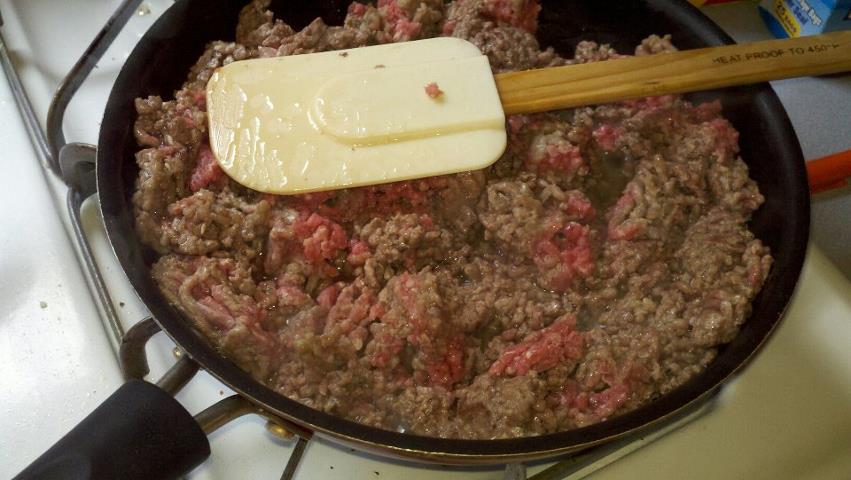

After draining off the fat, add the called for amount of water and the seasoning and simmer on the stove until cooked according to package directions.

While the beef is cooking you'll want to set up your "assembly line". You will need 10 squares of plastic wrap and 10 squares of tinfoil. It may seem like overkill to use both but trust me the finished product will freeze better and stay fresher this way. In addition, you won't need to worry about freezer burn or excess moisture from icy buildup.
 |
| Make the squares roughly the size of your tortillas. |
Once you get going you're going to get into a groove, so set yourself up for success. I hang the squares over the edge of a cabinet, alternating tinfoil and plastic wrap so they don't stick together. I get all 10 sets hung up and once I get making the burritos it's super easy to grab a set off and wrap.
 |
| My tinfoil-plastic wrap station. |
 |
| Tortillas and beef are ready to go. |
 |
| I set up a prep pan with the beans, shredded cheese, salsa and rice in it. This keeps everything together and makes it easier to clean up later. |

I use a scale to measure out my other ingredients so that all of the burritos are roughly the same size but you don't have to be this precise. I do not cook the beans- I just rinse them. I've found that cooking them makes them really mushy and they will cook when they get microwaved later. I use roughly 4 oz of meat and 1.5 oz of beans.

Add 1.5 oz of rice.

Dump it all onto the burrito and use a spoon to spread it out so that it's easier to roll up.

You want to fold in the sides to hold in the filling and then roll upwards. Keep a couple fingers on it to keep it sealed when you are done rolling.

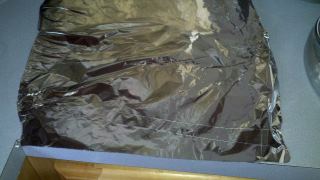
Really quickly tuck the plastic wrap over the burrito roll it up leaving the ends of the plastic wrap hanging.

Twist the ends so that it looks like a tootsie roll. Trust me this makes them much much easier to open later after they're frozen.

 |
| Tuck the tootsie roll ends under and place on the tinfoil. I use the shiny side in since the dull side is easier to read writing on. |
 |
| Label the burritos with the date made and any ingredient notes. |
Repeat until you've made all 10 burritos. Here's a happy finished stack of burritos on my counter.

Put the burritos in your freezer and feel very very proud of yourself. To serve unwrap the tinfoil and plastic wrap, put on a plate and microwave for 3 minutes.
|
| Nothing says preparation like quick dinners lined up in the freezer. |
Enjoy!
What a great road trip meal--or as you said, meal to have ready for anything.
ReplyDeleteThanks Elena! They are pretty convenient. Our family knows that they can grab one out of the freezer for a quick meal and I know it's not processed crap in a tortilla! I also did another version with Kale & Chicken. http://ramblingstump.blogspot.com/2012/07/kale-chicken-freezer-burritos.html
DeleteI've been looking for quick meals. These look yummy. I love rice in my burritos.
ReplyDeleteI do too! It also helps to stretch the meat making these an affordable meal on the go option.
DeleteYUMMY!! and great idea!
ReplyDelete