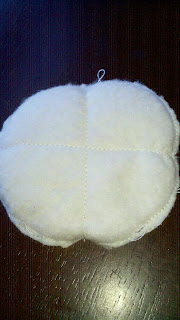
If you read my blog regularly you may have figured out by now that I like finding multiple ways to use things and ways to do things the cheapest. I made a baby quilt for a friend's baby shower (tutorial coming soon!) and lucked out on some queen size cotton batting sheets for 19.99 at Joann Fabrics (regularly 39.99). Plus I had a 20% off coupon. They contained roughly 6 yards of batting which broke down the cost to 3.33 a yard (2.67/yd including the 20% off) versus the normal by the yard cost of 10.99. They were also all-natural which was great. I grabbed two figuring they'd be great to have on hand and they also fit another project I was working on - doublers for cloth diapers. After finishing the baby quilt I had stacks of 4" squares left that I had cut (mental note- you only need half as many quilt squares as patterned squares :) ). They were the perfect size to make reusable breast pads that would fit into a bra for nursing mothers. Cotton tends to be the choice for reusable pads that you can buy in the store as well. I prefer the reusable pads over the disposable one because the plastic lining in the disposable pads is sometimes thought to contribute to excess moisture leading to chapping and thrush.
Each set of pads probably took me less than ten minutes. Here's how I did it:
1. Cut 2-3 squares of quilting batting (100% cotton) or use leftover squares. You'll be stacking the batting squares to form the soaking pad so it is a matter of personal preference on how many to use. I used two layers since the batting was nice and thick.
 |
| Square of batting |
 |
| Trace around the circular object. I've got two squares under this cup. |
 |
| I traced with a sharpie. It washed off the first time I washed it since most of the color stays on the fuzzy surface of the batting. |
2. On your sewing machine sew with a thin stitching around the circle. You want a total of two "laps" so I just go around the circle twice without stopping. Be sure to do a reverse stitch at the beginning and end which will help strengthen your seams. Sewing in a circle shape can be a bit tricky for beginners so go slowly. The nice added benefit of sewing a circle is that it helps the fabric form a little cup which makes them sit in your bra really smoothly.
 |
| Make sure that you have however many squares you'll be using stacked together when you sew. If you seam them individually you'll have to sew them all together later which is a pain. |
Use scissors to cut around the seaming and remove all the excess square fabric.
 |
| You'll be left with a nice circular pad. |
Voila! A stash of soaker pads. Each set of two took less than 10 minutes to make so you could churn out a bunch fairly quickly. I washed these with my daughter's clothes and they "compacted" a tiny bit but didn't shrink significantly.
 |
| Two sets of breast pads. Package them in a cute drawstring bag for a great baby shower gift. |
Happy Sewing!
(Please link back to my blog to share the tutorial- or contact me at ramblingstump (at) gmail.com for permission to post the full tutorial on your blog with a link back.)


YEP! Wish I knew about this when I was nursing!
ReplyDelete