This will be a short sweet and to the point blog. I'm sure you've all had a night swallowed up by the unexpected! I put my adorable naked 10 month old into her playpen (where she sleeps) to grab a Snappi for her diaper. A minute later on my return I realized she had peed while standing up through the mesh and was both sitting in it and licking the mesh. Ughh. This resulted in a bath, her going to bed in the crib, and the toddler in our bed.
A trip to Costco this weekend yielded a multipack of tofu. Price-wise it was a great deal on three to four meals worth of protein. Inspired by a recipe on Cara's Cravings, I jumped off from that point and created a twist that fit my pantry.
Coconut Krispie Baked Tofu
Serves 4
1 lb firm tofu
2 egg whites
3/4 cup Rice Krispies
1/3 cup coconut
cooking spray
1/4 cup soy sauce
3 TBS maple syrup for sauce
1. Preheat oven to 425. Set up a cookie rack on top of a cookie sheet and spray it with cooking spray. Pour Rice Krispies and coconut into the food processor and pulse until the size of breadcrumbs. Pour onto a plate.
2. Remove tofu from liquid and pat dry on a paper towel. Mine came in four squares which I halved horizontally and then cut diagonally to create 4 triangles per square. (16 total).
3. Crack the egg whites onto a plate and dip the tofu into it. Make sure to egg both sides. It is easiest to egg a few at a time, drop them onto the coconut Krispie plate and then use your fingers to cover them completely with coconut. Then rinse your fingers and start again. Put the tofu onto the cookie rack.
4. Bake for 5 minutes, turn down the heat to 400 and bake for an additional 10.
5. Serve with dipping sauce (mix together soy sauce and maple) if desired. I also love to saute fresh spinach and serve it on the side.
Showing posts with label Quick. Show all posts
3.13.2013
10.27.2012
Chocolate Peanut Butter Bars AKA Party In Your Mouth
Pinterest viewing can be fattening to your health. I saw a picture on Pinterest of a Chocolate Peanut Bar (they called it a Reese's bar but I really don't want to be sued by Reese's since it contains no actual Reese's) and it reminded me of my Starbucks days. I worked at Starbucks for six years. It was a great job in college and I have fond memories of sitting down after a shift with a hot cocoa and a chocolate peanut butter bar to study. Plus the recipe called for graham cracker crumbs, which leads me to the question- Why the heck are crumbs sold in such big boxers? I was more than happy to use up the rest of the box I had on these. I think it was originally from a cheesecake a few years ago.
The original recipe can be found on Let's Dish Recipes.
I adapted it slightly to use up some extra Hershey bars from s'more season and after doing the first batch realized I would halve the amounts of the peanut butter layer to make a more balanced bar. Also, I make it in a square Pyrex not the 9*13 that was originally recommended. This recipe is by no means a healthy recipe so it's best made when you know it will be shared. Otherwise (if you're like me) you'll just grab a piece every time you open the fridge.
1 cup graham cracker crumbs
1/2 cup melted butter
1/2 cup peanut butter (I spray the measuring cup with cooking spray so the pb slides out.)
1 cup confectioner's sugar
4 Hershey bars (1.55 oz bars) broken up into the squares
1 more large spoonful of peanut butter (roughly 2 TBS)
1. Melt the butter in a microwave or pan. In a bowl mix the melted butter, 1/2 cup of peanut butter, confectioner's sugar and graham cracker crumbs and stir until well mixed into a paste. Spray a square glass pan (9*9) with cooking spray then line the bottom with the paste. Even out the top so it is as smooth as possible.
2. In a microwave safe bowl heat the pieces of Hershey bar and the large spoonful of peanut butter until the bars are melt-y. Stir and put back in for a few more seconds if you feel like it's not smooth enough. Just be careful, burnt chocolate does not taste good! Spread the chocolate peanut butter mixture on top of the peanut butter layer and smooth out the top.
3. Put the pan in the fridge for at least 30 minutes. Cut into squares and eat with friends! Beware they are addictive! I have found that storage in the fridge is best but taking them out and setting them on the counter for 5 minutes makes them easiest to cut.
And yes I keep a fork & knife in the pan for ease of eating :) The fact that this many remain 4 days after I made them is a testament to my willpower.
9.03.2012
When Potty Training Gets You Down, Make Oven S'mores
Ahh, potty training. It's happening in our house and it's actually been going well. The toddler announces "Potty" and we stop whatever we're doing to hustle her off to the bathroom. With any luck she goes pee-pee on the potty (occasionally we catch her squatting in the hall on the way) and we clap (no, my 15 year old self did not see this coming). Then I walked into Target to buy "big girl" underwear and realized that all the "panties" have ruffles and glitter and decor on them. My mind started .... I want to say going in circles but it was more like an elf on a pogo stick eating cotton candy. Craziness. I don't want to get my daughter underwear that she wants to show to people because it's pretty! She turned two a week ago- this is not the age to start teaching her that underwear needs to be covered in glitter, lace, and Tinkerbell. And I certainly don't need her thinking it's to show off. So I stood there and deliberated and in the end against my usual thrifty behavior I bought her a pack of boys briefs. It came with half the amount of underwear and cost twice as much but at least I know that if she shows it it's because of her pride in the accomplishment of potty training and not because she has a fairy princess plastered on her behind.
Thinking about her wanting to show off her behind got me a little stressed out so I went home and made oven s'mores. We always have the supplies on hand and after some experimentation I've found that the inside ones taste pretty darn good in a pinch. They soothe a mother's frazzled soul :)
Oven S'mores
(makes 6- don't share....)
6 graham crackers
6 marshmallows
1 bar of chocolate (Hershey's)
a few teaspoons of Nutella
parchment paper
1. Heat oven to 375. Line a cookie sheet with parchment paper. Break the graham crackers in half (set aside half) and put them on the parchment paper. Take a marshmallow and put a little schmear of Nutella on it (it helps the marshmallow stay on the cracker and it tastes yummy). Repeat.
2. Bake for 4-7 minutes. Watch closely for the marshmallows to poof up. If you let them cook for too long the graham cracker can burn.
3. Pull out of the oven and top each with 3 squares of chocolate.
4. Eat while researching convents you can send your daughter to. Enjoy.
Thinking about her wanting to show off her behind got me a little stressed out so I went home and made oven s'mores. We always have the supplies on hand and after some experimentation I've found that the inside ones taste pretty darn good in a pinch. They soothe a mother's frazzled soul :)
Oven S'mores
(makes 6- don't share....)
6 graham crackers
6 marshmallows
1 bar of chocolate (Hershey's)
a few teaspoons of Nutella
parchment paper
1. Heat oven to 375. Line a cookie sheet with parchment paper. Break the graham crackers in half (set aside half) and put them on the parchment paper. Take a marshmallow and put a little schmear of Nutella on it (it helps the marshmallow stay on the cracker and it tastes yummy). Repeat.
2. Bake for 4-7 minutes. Watch closely for the marshmallows to poof up. If you let them cook for too long the graham cracker can burn.
3. Pull out of the oven and top each with 3 squares of chocolate.
4. Eat while researching convents you can send your daughter to. Enjoy.
8.23.2012
No Crumb Banana Chocolate Chip Muffins
My kids love muffins, particularly my toddler. If it's in muffin form she'll eat it. I love my kids but I don't love the disastrous crumb graveyards they leave everywhere after eating muffins. Enter my no crumb muffin. Yes, it's a bold statement to make but these muffins bind together so well I've even been known to hand my son one to eat in the car. These muffins are heavier than a normal muffin and have none of the "fluff" of a traditional muffin. That heaviness fills little bellies up and keeps them satisfied for hours.
![]() |
| See, no crumbs- even after gnawing thru one side. Chocolate face on the other hand is another matter. |
No Crumb Banana Chocolate Chip Muffins
makes 12 large muffins or 18 medium ones
4 ripe bananas
1/3 cup brown sugar, packed
1/2 tsp salt
3/4 tsp baking soda
1 tsp baking powder
2/3 cup Stonyfield Farm Lowfat Banilla Yogurt (you can substitute your favorite flavor)
2 3/4 cup flour
6 oz chocolate chips
Preheat oven to 350. Spray a muffin tin with cooking spray.
Mash bananas (I was lazy and just whisked them in the mixer. Add in all other ingredients except chocolate chips. Mix until all ingredients are blended. Add chocolate chips and blend until incorporated. Scoop into muffin tins. Fill all the way for 12 muffins. If you fill 2/3 full it will make 18 muffins. They puff up quite a bit.
Bake for 20 minutes. Enjoy the easiest banana muffins ever, you can thank me for the lack of crumbs later :)
Variation: Just made these with blueberry yogurt, cinnamon, and blueberries instead of chocolate chips- still used the banana. They are awesome but turned out a creepy gray color. May use this for Halloween!
8.12.2012
Squash and Cheese, Macaroni's Healthy Cousin
I believe that last week included a holiday known as "National Leave a Zucchini on Your Neighbor's Porch Day". Even if you don't have a green thumb, zucchini and squash in gardens tend to do what bunnies do- multiply! Then you are left with an assortment of baseball bat sized zucchinis and you're begging folks to take squash home every time they come over. One particularly abundant year I sent our UPS man off with a bag of produce.
![]() |
| This was one day's harvest. I swear they weren't there the day before when I looked! |
Ooey Gooey Squash and Cheese
(serves 4 hearty servings)
A glut of zucchini or squash, I used about 2 1/2 lbs- chopped into rounds it was close to 8 cups of summer squash
2 TBS oil (I used olive oil.)
3 TBS butter
3 TBS flour
1 1/4 cups milk
1 1/2 tsp paprika
1 tsp dried mustard
1 tsp kosher salt
1/2 tsp pepper
1 1/4 cups shredded cheddar cheese
1. Wash the squash. I leave the skin on otherwise that texture ends up a little- well, squashy- after you cook it. If the squash is large slice it lengthwise and remove the seeds. (Bonus on this preparation is that you end up with elbow macaroni shaped slices.) Slice squash into 1/4" thick slices.
2. In a stockpot heat up 2 TBS oil. Add the squash and saute gently for 3-5 minutes flipping to coat all the slices. Turn the heat down to low and cover. The squash will continue to steam. Stir occasionally to prevent sticking.
3. In a saucepan melt the butter over medium heat. Measure out your milk. When the butter is melted add the floor and whisk gently to make a smooth paste.
Slowly whisk in the milk to form a roux (basically a white gravy). Add in salt, pepper, paprika, and mustard.
Add the cheese, stirring gently to mix. Let it heat until melted completely.
4. Pour cheese sauce over the squash and stir gently until all the squash is coated in ooey, gooey melted cheese. Serve to a happy family and enjoy!
Note: This is great in the fridge as leftovers for quick kid lunches.
7.18.2012
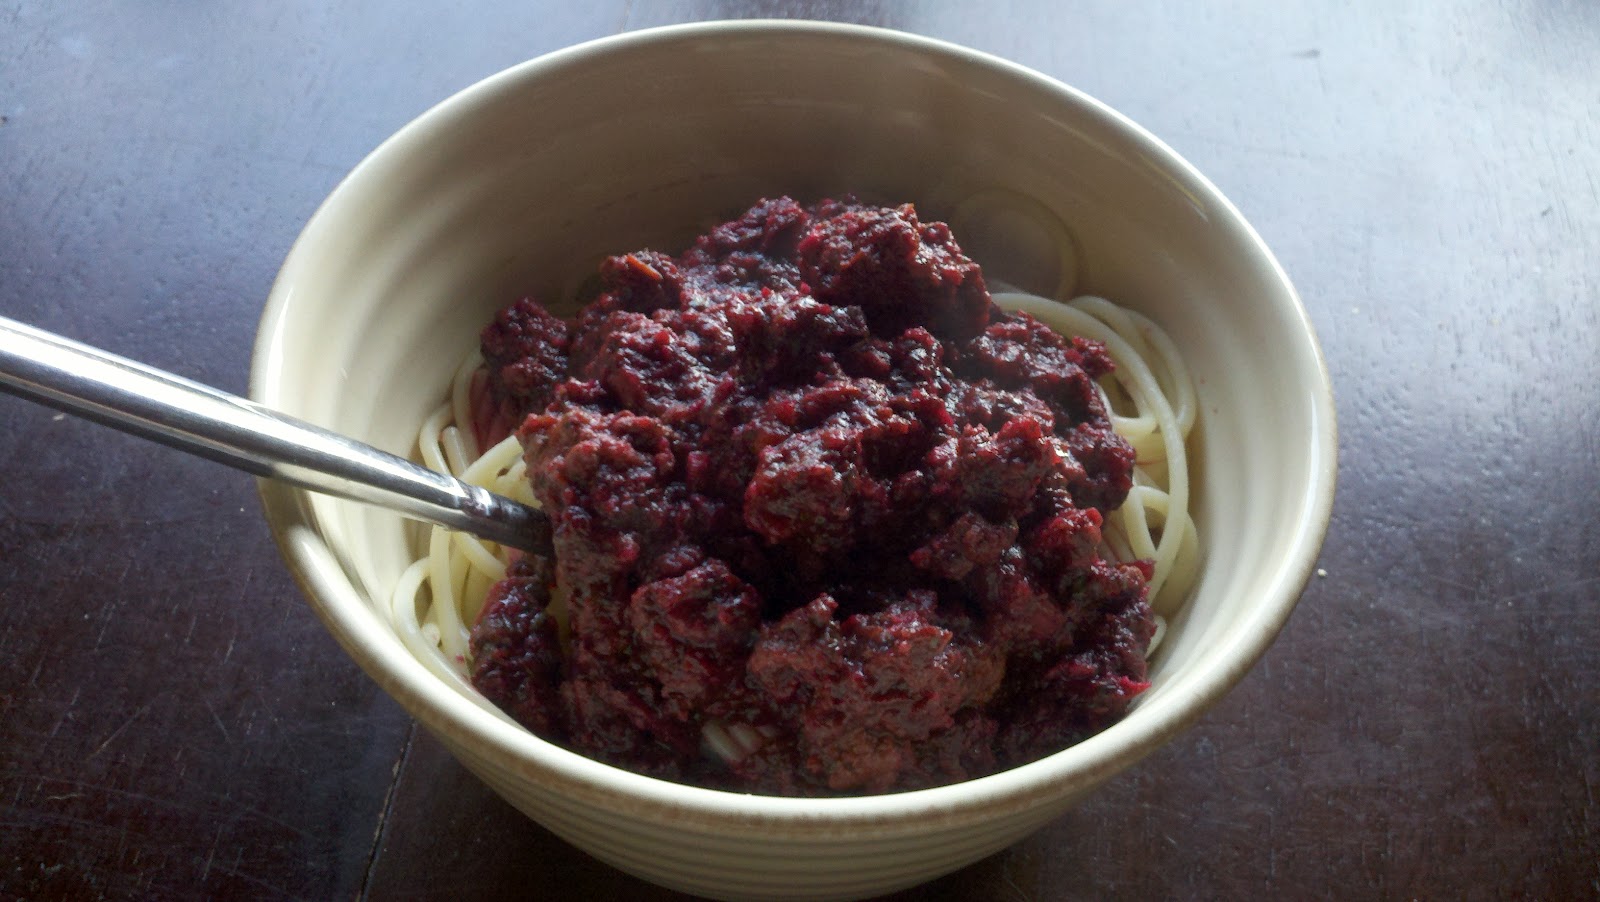
Hidden Veggies Beet Spaghetti Sauce
Think your kids won't eat beets? We kept getting them in the CSA basket and I was determined to do something with them that was different. Beet recipes so often gear towards roasting and I wanted to put them into something that was already a hit in our house. Success! My son had seconds, my daughter loved the purple color and I loved that there was a pound of veggies crammed into the sauce. This recipe pulls double duty because you can use leftovers over mashed potatoes or as a sloppy joe filling.
Hidden Veggies Beet Spaghetti Sauce
(serves 6-8; great for leftovers)
1 lb ground beef
6-8 oz mushrooms
4 oz spinach
1 oz arugula (optional- I love the peppery bite it gives the sauce)
6 oz beets, tops & roots removed (no need to peel)
1 can plain tomato sauce
1/2 tsp garlic powder
1. Brown ground beef in a saucepan. Drain off the fat. While the beef is browning de-stem and slice the mushrooms.
2. Add mushrooms to the ground beef.
3. Measure out 4 oz spinach, 1 oz arugula and 6 oz beets (roughly one small bunch).
Chop them all up in the food processor.
4. Add the veggies to the ground beef and mushrooms. Add a can of traditional spaghetti sauce (I use generic Hannaford's brand 95 cent sauce). Stir to combine. Add garlic powder and heat through.
5. Serve sauce over noodles, potatoes or as the filling for sloppy joes. Enjoy!
6.30.2012
Pork with Mustard Sauce and Dill & Shallot Potatoes
It was hot today. Not melt your brain 108 degree hot like my Southern friends but hot for Vermont. I did a quick sear and oven bake of our pork to minimize the amount of time the oven had to be on. The end result went over well. My husband had thirds and the 8 year old gave me a hug and told me he loved me so I guess I did something right! Pork sirloin cutlets are frequently discounted in our supermarket and I personally like them better than chops so we use them a bit. Not a ton of pictures in this one because the toddler was wondering around with an ice pack on her boo-boo, the baby was spitting her binky out, and the 8 year old was questioning every single thing I was doing. In other words, a totally normal day.
Pork with Mustard Sauce
(serves 6)
3 lbs of pork sirloin cutlets
salt & pepper
1 TBS butter
2 TBS dijon-type mustard
2 TBS ricotta cheese (could also use sour cream)
1 TBS maple syrup
This could not be easier. Preheat the oven to 450 and cover a cookie sheet with foil. In a pan on the stove melt the butter. Sear the pork sirloin pieces on both sides so that you can just see a small line of pink in the middle. About 2-3 minutes on each side should do it. Lay the meat on the cookie sheet.
Put it in the oven for 10-15 minutes. It will depend on how big your pieces are. Using a meat thermometer the pork should reach a temperature of 160. The USDA recently dropped their guideline to 145 but I feel better cooking it to 160.
While the pork is cooking mix together the mustard, ricotta, and maple to make your sauce. You can use sour cream if you'd like. I always have ricotta on hand and love the creamy texture it gives the sauce.
Dill & Shallot Potatoes
(serves 6)
6 medium red-skinned potatoes
1/2 tsp salt
3 TBS butter, split
1/4-1/3 cup milk
2 TBS fresh dill
1/2 large shallot, sliced
Rough chop the potatoes into chunks (leave the skins on) and toss them into a pan of boiling water. Boil for roughly 8 minutes or until fork tender. In a saucepan, melt 1 TBS of the butter and brown the sliced shallots in it. Drain potatoes and put them into a mixing bowl. Add 2 TBS of butter, the browned shallots, salt, and dill and mix. Add milk slowly stopping when the mixture comes together.
Serve with a green salad if you'd like and enjoy!
6.25.2012
Mexican Tuna Casserole
Tuna casserole evokes warm homey memories in many folks. I love to eat it but also adore experimenting with it. This time I decided to replace the cream soup and try to add some Mexican flavors. The results were met with overwhelming support from my husband and son. I love putting a crunchy topping in the ramekins and serving them individually.
You'll notice that in the recipe I use a half can of multiple ingredients. If you want to you can easily double the recipe, or you can double everything but the noodles and cheese and set aside half of the bean mixture to use for dip (it was delicious)!
Mexican Tuna Casserole
Serves 6
2 cups dry egg noodles
1/2 15 oz can black beans
1/2 15 oz can black olives
1/2 cup salsa
1 1/2 cups shredded cheddar cheese
2 cans tuna
handful of tortilla chips
1. Preheat oven to 350. Boil water in a large saucepan on the stove. Add 2 cups of dry egg noodles and set for 8 minutes.
2. In the food processor blend a drained can of black beans, salsa, and olives.
3. Once noodles are done cooking drain them. Mix in two cans of drained tuna. Add black bean mixture to noodles and stir. Add 1/2 of the cheese.
Divide the mixture between 6 ramekins that have been sprayed with cooking spray. Crumble a few tortilla chips on the top of each one and then top with shredded cheese. (Note: If you want to be able to flip the casseroles out onto plates to serve you can put the tortilla chips and cheese on the bottom. )
Bake for 10 minutes at 350.
Enjoy!
5.04.2012
Spinach and Mushroom Biscuits
It's been one of those weeks. After going to the hospital Tuesday night thinking "it was time" I was discharged. Sure my contractions were 2 minutes apart but I stopped dilating shortly before I hit 4 cm so I was sent on my merry way. Since then we've been in limbo. My son came in a little over an hour from the time that my water broke and I realized I was in labor. My daughter was born in less than 4 hours from my water breaking and it would have been faster if they hadn't slowed me down with medication because of a low heart rate. So, living about 1 hour and 15 minutes from the hospital has caused much logistical planning and some nights spent at my parents house (10 minutes from the hospital). After deciding to "brave" it tonight at home I was rummaging through the fridge trying to figure out what I needed to cook that wouldn't last if we were out of the house for another three days. Finding some hard boiled eggs, spinach & mushrooms I decided that biscuits were the best vehicle for them.
Lately I've had a love affair with biscuits. I bake batch after batch, smothering them in jam and butter. It might even qualify as a fetish. And I couldn't be happier with this Spinach & Mushroom version. My husband proclaimed them "awesome" and they will be on a regular rotation here because they contain the correct combo of speed, ease, and low cost.
Spinach Mushroom Biscuits
(Makes 8 biscuits- there will be extra spinach mushroom filling to eat as a side for lunch the next day)
Just want to make plain biscuits- gather the ingredients up through the asteriks & follow instructions below!
2 cups flour
1 TBS baking powder
1/2 tsp kosher salt
1/4 tsp baking soda
6 TBS butter
1 cup buttermilk (you could use regular milk but the buttermilk is sooo good!)
*****
8 oz sliced mushrooms
1/2 lg shallot
1 TBS oil
1/4 cup white wine (optional)
1/2 tsp kosher salt
1/4 tsp black pepper
8 oz spinach
2 hard boiled eggs
1. Preheat oven to 450. In your mixer combine 2 cups flour, 1/4 tsp baking soda, 1/2 tsp kosher salt and 1 TBS baking powder.
![]() |
| Run the mixer for a minute to blend it all. |
Throw it into the mixer a couple pieces at a time with the blade running.
![]() |
| The little butter chunks will start to get mashed into the flour. |
Measure out a cup of buttermilk. You could use regular dairy but the buttermilk flavor is amazing and incomparable.
Add the buttermilk into the mixer and mix until combined and sticky. There will still be tiny chunks of butter. This is ok.
Flour a cutting board to dump the dough onto.
Using a spatula, put a chunk of dough onto the flour. If you're making plain biscuits you can dump the whole batch out- if you'll be doing the spinach mushroom filling it's easiest to work with one quarter of the dough at a time.
For the filling, chop half of a shallot finely. Saute in a tablespoon of olive oil.
Pre-sliced mushrooms were on sale so that is what I bought. I threw them into the food processor quickly to mince them so that they would be "filling-sized".
Saute the shallots and the mushrooms together until golden brown. Add 1/4 cup of white wine (optional). Add salt and pepper.
Add 8 oz spinach. I roughly chopped mine. Stir a few times. You want it to wilt.
Once the spinach has wilted turn the heat up a tiny bit just to evaporate any excess liquid in the pan.
Dice up two hard boiled eggs. Toss them into the pan with the spinach and mushrooms and turn off the heat. Toss to combine.
My sous chef was growing restless and kept trying to pull down my pants so I gave her the mixer attachment to lick. I think she likes biscuits too. :)
Ok, back to the biscuit dough. You've already put a quarter of it onto your flour covered board. Use your palms to gently flatten it. Do NOT roll it out. Rolling it out presses all the air out and they won't puff up all pretty.
Now fold it in half and flip it so that the top side is now down in the flour. Flatten it again and repeat this step about 2 more times. This helps to add air so that the layers bake up fluffy.
At this point my hands were covered in flour and the sous chef kept yelling for daddy so I missed a photo. With the dough flat you want to spread one side of it with some of the mushroom and spinach filling. Then, fold the other side over to cover the filled side.
![]() |
| Filled and folded over. |
![]() |
| Flatten it out a little bit more, gently- so that the filling doesn't come out. |
Use a pint glass top to cut the biscuits out. Same deal if you decided not to fill them. It is very important to just push the pint glass straight down without twisting it. You should hear a little burping noise when you push down. That is good! It means your biscuits have air in them and will puff up (can you tell that puffing up is a really good thing yet?). Do not twist the glass. Twisting the glass as you cut crimps the edges and will yield flat dense biscuits.
Your biscuits should look like this:
Repeat the above process until you've used all your dough. You will probably have some leftover filling. That's fine. You can serve extra with the biscuits or save it for lunch the next day. I like to spread it on crackers.
You can also make calzone shaped biscuits if you feel more comfortable. Just put some filling on and stretch the dough over.
Bake at 450 for 8 minutes. They will look delectable and golden brown when they come out.
If you chose to not fill the biscuits and make plain ones they'll look lovely and golden too! I make these all the time- the height and the fluffiness is my ideal drool-worthy biscuit.
Serve immediately. They taste best warm. Enjoy!
![]() |
| Spinach Mushroom Biscuits |
Subscribe to:
Posts (Atom)