
Showing posts with label CSA. Show all posts
Showing posts with label CSA. Show all posts
11.18.2012
Turkey Stuffed Delicata Squash with Mushroom Gravy
I love Thanksgiving- the cooking, the family, the traditions and the flavors. A pile of delicata squash has been taunting me for weeks now. After canning slices of about 15 pounds of it I was at a loss with what to do to the rest. I've seen recipes for stuffed delicata before but always in "boat" form. Whether you just like Thanksgiving flavors or you're aiming for a smaller holiday with an easier turkey main dish this stuffed delicata looks chic on the plate and pairs well with traditional flavors. From a budget standpoint 1 lb of meat is stretched very far here. In our household I sometimes use only 4 squash and then cook the extra meat with a little cheese on top in two ramekins for toddler meals.


10.11.2012
Apple Curry Squash Soup
Autumn is here in Vermont. Actually, technically it's practically over. Peak foliage has passed. Leaves are on the ground and snow has already hit the mountain tops. Which means it is prime soup weather. I love soup. A bowl of it with slices of homemade bread is one of my very favorite lunches.
I also love to can. There is something about hoarding mason jars that makes me really happy. As I follow USDA regulations I don't can anything with dairy so the two soups I made this week are all vegan and very healthy as I also didn't use any oil.

You will need:
2 lbs (about 2 cups) roasted butternut squash (Check out my post on easily roasting a squash whole.)
1 lb of apples, sectioned but not peeled (Macintosh or another squishy saucing apple works best)
1/2 cup sliced red onions
1 clove garlic, minced
1/4 cup apple cider vinegar
1 1/2 tsp kosher salt
1/2 tsp black pepper
1 TBS curry powder
6 cups vegetarian stock (I use a Vegetarian "Chicken" Flavored powder, 1 tsp per cup)
Chop apples leaving the skins on. Slice onions and mince garlic. Put it all into a stockpot and saute using the cider vinegar. (If you wanted to you could substitute in a little oil here.) The apples will start getting a little squishy. This means you are ready to puree.

Return the puree to the pan and heat.
Simmer the soup over low until slightly reduced for about 20 minutes. Taste and add salt if necessary (curry usually has salt in it so I always undersalt then taste it to avoid a salt-tastrophe!).
I also love to can. There is something about hoarding mason jars that makes me really happy. As I follow USDA regulations I don't can anything with dairy so the two soups I made this week are all vegan and very healthy as I also didn't use any oil.

2 lbs (about 2 cups) roasted butternut squash (Check out my post on easily roasting a squash whole.)
1 lb of apples, sectioned but not peeled (Macintosh or another squishy saucing apple works best)
1/2 cup sliced red onions
1 clove garlic, minced
1/4 cup apple cider vinegar
1 1/2 tsp kosher salt
1/2 tsp black pepper
1 TBS curry powder
6 cups vegetarian stock (I use a Vegetarian "Chicken" Flavored powder, 1 tsp per cup)
Chop apples leaving the skins on. Slice onions and mince garlic. Put it all into a stockpot and saute using the cider vinegar. (If you wanted to you could substitute in a little oil here.) The apples will start getting a little squishy. This means you are ready to puree.

 |
| Puree the apples, onions, and garlic. Add 1 1/2 tsp of salt and 1/2 tsp pepper to the puree and mix. |
 |
| Add the 6 cups of stock into the apple puree. |
 |
| Puree 2 cups of squash until smooth and add to the pan. Stir in well. |
 |
| Add curry into pan and mix in. |
If you're serving it right away then dish it out and enjoy with some bread!
If you're canning it make sure to use clean, hot sterilized jars. Fill the jars leaving about 3/4" of headspace. Wipe the rim and threads and top with clean sterilized NEW lids and a clean ring tightened (but not cranked on too tight). The soup will need to be pressure canned at 11 lbs of pressure (I do 15 since I have a weighted canner) for 55 minutes. Store for up to a year to enjoy on cold winter days.


8.27.2012
Chocolate Beet Cupcakes

"There are beets in these? Really?" That was the overwhelming reaction to the cupcakes I served at my daughter's birthday party this weekend. The next statement, "So that's what you're doing with all those beets!" (I had been posting pictures like this for weeks.)

Chocolate Beet Cupcakes
Makes 12
1 1/2 cups pureed beets (you can use a can of beets & puree them if you'd like- a 15 oz can with a little additional water would do the trick)
3/4 cup flour
3/4 cup sugar
1/2 cup cocoa
1/4 + 1/8 cup milk (can be replaced w/ non dairy milk for vegan)
1/2 tsp salt
1 tsp baking soda
1 tbsp baking powder
1 cup chocolate chips (can be replaced w/ carob chips for vegan version) The chocolate chips add a gooey decadent feel to the cupcakes- reduce the amount if you don't want them as gooey.
1. Preheat oven to 350.
2. In mixer, mix together beet puree, flour, sugar, cocoa, and milk. (I measure everything out using a 1/4 cup measure- then I use the same cup to "dose" out each cupcake into the pan, only 1 cup to wash then!). Add the salt, soda, and powder and mix. Add the chocolate chips and mix to distribute. The batter will look luscious and red velvet-esque.

 |
| Use liners! These moist cupcakes are easiest to store when in liners. |
3. Bake at 350 for 20 minutes. Take out and let them cool. Resist the temptation to eat them all. If you're throwing a monster birthday party for your 2 year old feel free to frost them and give them eyes made out of candy :) They also freeze fantastically and can be pulled out and microwaved for 30-60 seconds for a quick chocolate fix that's chock full of veggies!

8.12.2012
Squash and Cheese, Macaroni's Healthy Cousin

I believe that last week included a holiday known as "National Leave a Zucchini on Your Neighbor's Porch Day". Even if you don't have a green thumb, zucchini and squash in gardens tend to do what bunnies do- multiply! Then you are left with an assortment of baseball bat sized zucchinis and you're begging folks to take squash home every time they come over. One particularly abundant year I sent our UPS man off with a bag of produce.
 |
| This was one day's harvest. I swear they weren't there the day before when I looked! |
Ooey Gooey Squash and Cheese
(serves 4 hearty servings)
A glut of zucchini or squash, I used about 2 1/2 lbs- chopped into rounds it was close to 8 cups of summer squash
2 TBS oil (I used olive oil.)
3 TBS butter
3 TBS flour
1 1/4 cups milk
1 1/2 tsp paprika
1 tsp dried mustard
1 tsp kosher salt
1/2 tsp pepper
1 1/4 cups shredded cheddar cheese
1. Wash the squash. I leave the skin on otherwise that texture ends up a little- well, squashy- after you cook it. If the squash is large slice it lengthwise and remove the seeds. (Bonus on this preparation is that you end up with elbow macaroni shaped slices.) Slice squash into 1/4" thick slices.
2. In a stockpot heat up 2 TBS oil. Add the squash and saute gently for 3-5 minutes flipping to coat all the slices. Turn the heat down to low and cover. The squash will continue to steam. Stir occasionally to prevent sticking.

3. In a saucepan melt the butter over medium heat. Measure out your milk. When the butter is melted add the floor and whisk gently to make a smooth paste.

Add the cheese, stirring gently to mix. Let it heat until melted completely.

4. Pour cheese sauce over the squash and stir gently until all the squash is coated in ooey, gooey melted cheese. Serve to a happy family and enjoy!
Note: This is great in the fridge as leftovers for quick kid lunches.
8.10.2012
Pineapple Basil Jam
 |
| Nothing better than jam and fresh baked bread! |
I have a Ball jar problem. I see them in the store and I have to have them. I have stacks of flats in my home and once they're staring me in the face I spend hours in the kitchen playing around with ideas until things work.
 |
| This isn't even all of them. |
Our farm share has been yielding copious amounts of the most beautiful basil. Now I love pesto as much as the next girl (maybe more, I'm allergic to pine nuts so I have to make my own to ensure it's safe for me) but I wasn't feeling inspired to make some. So I left the basil in the fridge for a few days and was the creepy lady who pulled out the bag occasionally just to sniff it.
I had been toying with the idea of a pineapple jelly when I realized that the flavors would compliment each other. It was a huge hit. Yasmina licked it off of cracker after cracker at dinner and demanded more, I used it to glaze chicken one night, and the cherry on the sundae was that it won both a blue ribbon and a best of show ribbon at our regional fair. (My husband demands that I insert here the fact that I competed against and beat Amish people. Apparently, he is impressed with their jam making skills and this elevates my win.)
 |
| She is a big fan of the giant purple ribbon. |
I hope you enjoy it! This is actually a great beginner's jam so if you're just starting out try it....
Pineapple Basil Jam
(makes 6 12 oz jelly jars) and a tiny bit extra to go into the fridge for snacking
1 20 oz can of pineapple (you can use crushed or food process rings or chunks)
1 1/2 cups basil, chopped (you can use unpretty basil that has a few spots since you'll be discarding the boiled leaves)
3 cups water
1.75 oz pectin powder (Make sure you weigh this out.)
3 cups sugar
Note: For this recipe you will need prepared canning jars. For instructions on preparing jars for canning visit the Ball website, 2nd question down. You will also need a prepared ladle so keep that in mind and boil it when you do the jars!
 1. Boil chopped basil in water for 10 minutes. Take it off the heat, cover & let it sit for 10 additional minutes. Strain into a bowl discarding the basil and reserving the water. Measure out 2 1/2 cups of the basil water for the jam.

2. Pour can of crushed pineapple into saucepan.
Add the 2 1/2 cups of basil water.
 3. Add 3 cups of sugar and bring it up to a rolling boil. A rolling boil means that when it boils and you go to stir it it continues to boil. Stir the mixture with a wooden spoon to ensure that the sugar gets incorporated completely.
4. Add pectin powder to boiling mixture and stir well to mix in. Boil for 1 minute at a high boil.
 5. Remove from the heat and use the wooden spoon to skim the foam off the top of the jam. Discard the foam. Using a sterilized ladle fill the prepared jars leaving 1/4" of room at the top (called headspace). I visualize my pinky finger on it's side as the amount of space I need to leave. There is usually about 4-6 oz extra of jam. I put that in a container in the fridge to eat right away.
  |
| I did my 1st batch in big jars, then wised up. |
7.18.2012
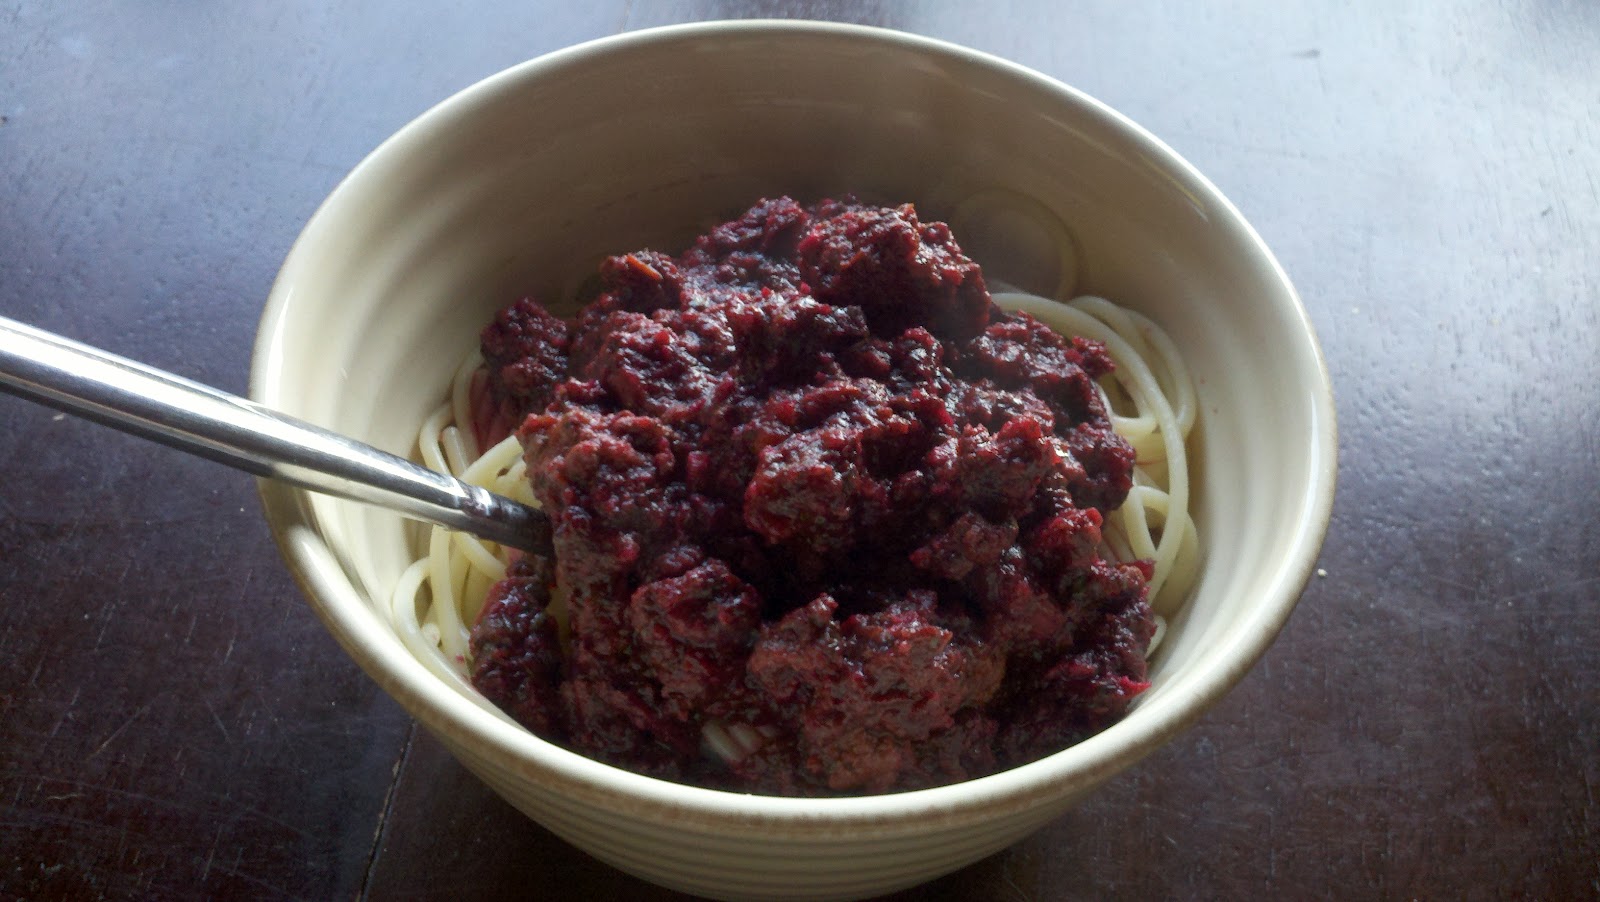
Hidden Veggies Beet Spaghetti Sauce

Think your kids won't eat beets? We kept getting them in the CSA basket and I was determined to do something with them that was different. Beet recipes so often gear towards roasting and I wanted to put them into something that was already a hit in our house. Success! My son had seconds, my daughter loved the purple color and I loved that there was a pound of veggies crammed into the sauce. This recipe pulls double duty because you can use leftovers over mashed potatoes or as a sloppy joe filling.

Hidden Veggies Beet Spaghetti Sauce
(serves 6-8; great for leftovers)
1 lb ground beef
6-8 oz mushrooms
4 oz spinach
1 oz arugula (optional- I love the peppery bite it gives the sauce)
6 oz beets, tops & roots removed (no need to peel)
1 can plain tomato sauce
1/2 tsp garlic powder
1. Brown ground beef in a saucepan. Drain off the fat. While the beef is browning de-stem and slice the mushrooms.
2. Add mushrooms to the ground beef.

3. Measure out 4 oz spinach, 1 oz arugula and 6 oz beets (roughly one small bunch).


Chop them all up in the food processor.

4. Add the veggies to the ground beef and mushrooms. Add a can of traditional spaghetti sauce (I use generic Hannaford's brand 95 cent sauce). Stir to combine. Add garlic powder and heat through.


5. Serve sauce over noodles, potatoes or as the filling for sloppy joes. Enjoy!
7.02.2012
Kale & Chicken Freezer Burritos

Kale is abundant at our CSA right now. I've made kale chips, I stirfry it with apples and bacon for quick dinners but I needed to do something new. After getting some sale priced chicken breasts, I cooked the entire package and made enchiladas with half. I shredded the rest and waited for inspiration to strike. Freezer burritos went over so well last time, and the idea of a quick meal has been super handy. With it getting hot out there are days where I just don't want to turn on the oven and having these on hand will solve that problem. My husband ate a few for lunch today, pronounced them "awesome" and they were child approved as well. The trick is to use the kale as a sauce to moisten the chicken.
There is a little Vermont humor in here too. We have an entrepreneur here, Bo Muller-Moore, who makes t-shirts that say Eat More Kale. Check out his website. Chick-Fil-A is currently suing him saying he can't use that phrase because it infringes on their "Eat Mor Chikin" slogan. Crappy spelling aside- I'm sure that most people can tell the difference between chicken and kale, the fonts are completely different, and there are no Chick-Fil-A's in the state of Vermont. I used to eat at Chick-Fil-A when I lived in Texas and I can tell you I will never set foot in one ever again after seeing the way that they bully small businesses. As a business that advertises themselves as a Christian business it is very un-Christian of them, unless they're trying to pull a David vs. Goliath.
Sorry- I got sidetracked. Anyways this recipe has more chicken in it than kale but the kale is truly the star of the dish. These burritos can be made to be frozen or served for a meal.
Kale & Chicken Burritos
(makes 16)
2 lbs of shredded chicken (I had crockpot cooked mine ahead of time. Great way to use leftovers.)
2 bunches of kale (roughly 24 oz)
2 TBS oil
1/2 large shallot
8 oz shredded Cabot Pepperjack cheese (I shredded a stick of it.)
1 tsp salt
16 flour tortillas
1. In a large pot on the stove, heat 2 TBS oil. Take 2 bunches of kale, chop off the bottom stems (don't bother taking out the large piece running down the middle), and cram them into the pot.


Using tongs flip the kale around a couple of times to get a little oil on it. Let it sizzle for about 5 minutes, then add 16 oz of water. Keep it on high heat and continue to flip the kale with the tongs. The kale should start wilting.
2. In a food processor, chop the shallot. Add the kale a little at a time, until it is all blended into a paste. Add the salt and 4-8 oz of water. You want it to be a thick sauce not runny. The shallot is important- you want to use some strong flavors when freezing items so that the taste holds up.

3. I pre-tear sections of tinfoil and plastic wrap and lay a tortilla on each one ahead of time. For photos feel free to check out my last burrito post . Dump your pureed kale sauce into the bowl of shredded chicken and mix well.

Dose out some of the kale chicken mix onto a tortilla. I used about 4 oz for each.

Top with cheese, I used 1/2 oz. I love my kitchen scale.
Now fold in the sides and roll it up.


Wrap the plastic wrap around the burrito, then the tinfoil. This helps to keep it fresh and to prevent freezer burn. Now label them and load your freezer! Enjoy them for quick lunches or no cook dinners on hot summer days. (3 minutes in the microwave is about right)

Subscribe to:
Posts (Atom)