Pages

Showing posts with label Crafts. Show all posts

4.15.2012

How to Make Absorbent Breast Pads


As a soon-to-be third time mother I'm in the depths of baby prep. With a 20 month old running around we have many of the items on hand that I need but I've been making a little list of "things to do" and make before baby comes. Breast pads were one of them. They also make great homemade baby shower gifts for expectant mothers. I made some for a friend as well and I thought they looked quite cute all packaged up in a little drawstring bag.


If you read my blog regularly you may have figured out by now that I like finding multiple ways to use things and ways to do things the cheapest. I made a baby quilt for a friend's baby shower (tutorial coming soon!) and lucked out on some queen size cotton batting sheets for 19.99 at Joann Fabrics (regularly 39.99). Plus I had a 20% off coupon. They contained roughly 6 yards of batting which broke down the cost to 3.33 a yard (2.67/yd including the 20% off) versus the normal by the yard cost of 10.99. They were also all-natural which was great. I grabbed two figuring they'd be great to have on hand and they also fit another project I was working on - doublers for cloth diapers. After finishing the baby quilt I had stacks of 4" squares left that I had cut (mental note- you only need half as many quilt squares as patterned squares :) ). They were the perfect size to make reusable breast pads that would fit into a bra for nursing mothers. Cotton tends to be the choice for reusable pads that you can buy in the store as well. I prefer the reusable pads over the disposable one because the plastic lining in the disposable pads is sometimes thought to contribute to excess moisture leading to chapping and thrush. 

Each set of pads probably took me less than ten minutes. Here's how I did it:

1. Cut 2-3 squares of quilting batting (100% cotton) or use leftover squares. You'll be stacking the batting squares to form the soaking pad so it is a matter of personal preference on how many to use. I used two layers since the batting was nice and thick. 

Square of batting
Find something circular to trace for the pad (or steal your kids compass). I used a Chinet plastic cup. The top had a diameter that took up almost the whole 4" square. Keep in mind that these will shrink a little bit when you wash them the first time so make them a bit bigger than you think you'll need.

Trace around the circular object. I've got two squares under this cup.

I traced with a sharpie. It washed off the first time I washed it since most of the color stays on the fuzzy surface of the batting.
2. On your sewing machine sew with a thin stitching around the circle. You want a total of two "laps" so I just go around the circle twice without stopping. Be sure to do a reverse stitch at the beginning and end which will help strengthen your seams. Sewing in a circle shape can be a bit tricky for beginners so go slowly. The nice added benefit of sewing a circle is that it helps the fabric form a little cup which makes them sit in your bra really smoothly.

Make sure that you have however many squares you'll be using stacked together when you sew. If you seam them individually you'll have to sew them all together later which is a pain. 

Use scissors to cut around the seaming and remove all the excess square fabric.
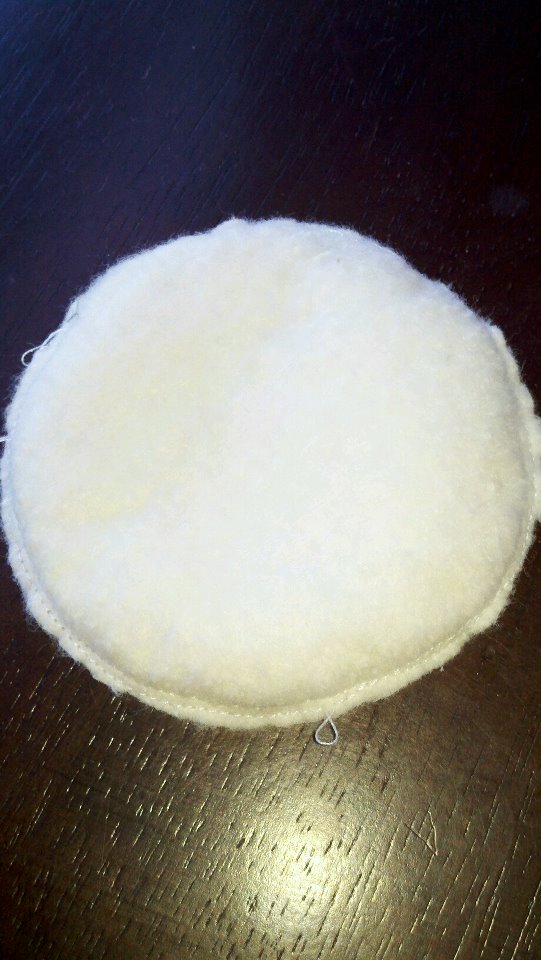
You'll be left with a nice circular pad.
3. To prevent bunching when you machine wash them you'll want to sew a big "X" on the pad to hold the layers of batting together. I just ran a quick seam horizontally and one vertically. Tie of the threads at the end and snip excess.


Voila! A stash of soaker pads. Each set of two took less than 10 minutes to make so you could churn out a bunch fairly quickly. I washed these with my daughter's clothes and they "compacted" a tiny bit but didn't shrink significantly. 

Two sets of breast pads. Package them in a cute drawstring bag for a great baby shower gift. 
I estimate the cost of two sets to be under a dollar to make, as it used far less than a yard of batting ($3.33/yd). The final cost will vary based on the batting that you purchase. I strongly suggest checking out full quilt batting at this time of year as they usually go on sale at the start of warmer seasons. You can also pretty these up a bit if you want by including a layer of printed or colored flannel on the outside. It will wick moisture away and provide a little "personality".

Happy Sewing! 

(Please link back to my blog to share the tutorial- or contact me at ramblingstump (at) gmail.com for permission to post the full tutorial on your blog with a link back.)


3.15.2012

Sweater-Wearing Laundry Basket Storage

We have a lot of laundry baskets. This is because after moving into our house in November 2010 we still aren't fully unpacked. Every new life change creates the need for us to switch our rooms around again and with room swaps come piles. What do I do when piles pile up? I buy laundry baskets at Big Lots and put the piles in them. Then I move them to another room. It's a vicious cycle. I also use laundry baskets to store toys in. They're cheap, easily moved, and easily cleaned. I spent some time recently pretty-ing up one for toy storage in our living room.

Yes, the dolls are naked. For some reason my daughter refuses to allow her dolls to wear clothes. You can dress them and she will sense that they are clothed, goes over and disrobes them. 


 I think it came out cute. Kind of looks like it's wearing a sweater.

You will need-
A laundry basket (Mine was $3 at Big Lots)
A straw
Scissors
Yarn- it works best if it has texture and is a little fluffy to fill the space (I had an old skein laying around.)

Take the laundry basket and empty all the crap out of it.


I unwound my yarn. I found it was easiest to cut off about 7 feet at a time and wind a small ball up to feed through the slats. Basically you are going to "weave" the yarn in and out of the slats. Tie a knot in around one of the corners to secure the beginning piece. It will get covered up as you go.


As you run out of yarn, cut a new long strand and tie it onto the end where you ran out. It is tempting to use a longer piece but trust me it just takes longer. And gets tangled, and leads to swearing. 


I did the top half first then went on to the bottom half. Once you are done you have a choice. Stop there and just have the woven yarn be the whole design. I decided to add some "embellishments". When I was in first grade my dad, who apparently has some very strange talents, "knitted" an Indian chief headress using yarn and drinking straws. This next part is inspired directly by that early crafting memory. Take the drinking straw and fold it in half at one end. Make a small cut with your scissors to create a "needle". 


Thread the yarn through the straw and choose the design you want to do. I did x's at each of the spots that the slats came together. Tie the knots for the ends on the inside where they don't show. Repeat at each "intersection". 


This is what my finished basket looked like. It's not the fanciest project I've ever completed but it cost me $3, matches my living room, took very little time, and if I decide I want to use the yarn for a different craft I'll just take it off the basket. I ended up using most of a standard size skein of yarn with a bit left over. Happy Crafting!