Pages

6.30.2012

Pork with Mustard Sauce and Dill & Shallot Potatoes


It was hot today. Not melt your brain 108 degree hot like my Southern friends but hot for Vermont. I did a quick sear and oven bake of our pork to minimize the amount of time the oven had to be on. The end result went over well. My husband had thirds and the 8 year old gave me a hug and told me he loved me so I guess I did something right! Pork sirloin cutlets are frequently discounted in our supermarket and I personally like them better than chops so we use them a bit. Not a ton of pictures in this one because the toddler was wondering around with an ice pack on her boo-boo, the baby was spitting her binky out, and the 8 year old was questioning every single thing I was doing. In other words, a totally normal day.

Pork with Mustard Sauce
(serves 6)

3 lbs of pork sirloin cutlets
salt & pepper
1 TBS butter
2 TBS dijon-type mustard
2 TBS ricotta cheese (could also use sour cream)
1 TBS maple syrup

This could not be easier. Preheat the oven to 450 and cover a cookie sheet with foil. In a pan on the stove melt the butter. Sear the pork sirloin pieces on both sides so that you can just see a small line of pink in the middle. About 2-3 minutes on each side should do it. Lay the meat on the cookie sheet.


Put it in the oven for 10-15 minutes. It will depend on how big your pieces are. Using a meat thermometer the pork should reach a temperature of 160. The USDA recently dropped their guideline to 145 but I feel better cooking it to 160.

While the pork is cooking mix together the mustard, ricotta, and maple to make your sauce. You can use sour cream if you'd like. I always have ricotta on hand and love the creamy texture it gives the sauce.

Dill & Shallot Potatoes
(serves 6) 

6 medium red-skinned potatoes
1/2 tsp salt
3 TBS butter, split
1/4-1/3 cup milk
2 TBS fresh dill
1/2 large shallot, sliced

Rough chop the potatoes into chunks (leave the skins on) and toss them into a pan of boiling water. Boil for roughly 8 minutes or until fork tender. In a saucepan, melt 1 TBS of the butter and brown the sliced shallots in it. Drain potatoes and put them into a mixing bowl. Add 2 TBS of butter, the browned shallots, salt, and dill and mix. Add milk slowly stopping when the mixture comes together.


Serve with a green salad if you'd like and enjoy!


6.27.2012

Garlic Scape Gnocchi with Mushrooms


Garlic scapes. Google them and you'll find 800 million garlic scape pesto recipes. These curly green snake-like veggies are abundant at my CSA at this time of year. I have to admit, I'm tired of scape pesto so I shook things up a little bit. It was freakin' delicious to shake things up. After roasting the scapes I blended them into a gnocchi base. The result? A mellow garlick-y green delicious fluffy ricotta pillow. These will happen again!


Garlic Scape Gnocchi with Mushrooms
Serves 4

Big Bunch of garlic scapes- enough to cover a cookie tray (I used about 1/2 lb)
1 egg
1 tsp salt
8 oz ricotta cheese
1 1/4 cups flour
1 1/2 lemons
8 oz mushrooms
2 TBS butter

1. Preheat oven to 325. Spray cookie sheet with cooking spray and lay scapes on it. Roast for 8 minutes and shut oven off. Leave the scapes in for a few more minutes. (If you roast for longer than 8 minutes the tips tend to burn- shutting off the oven avoids any burning.)


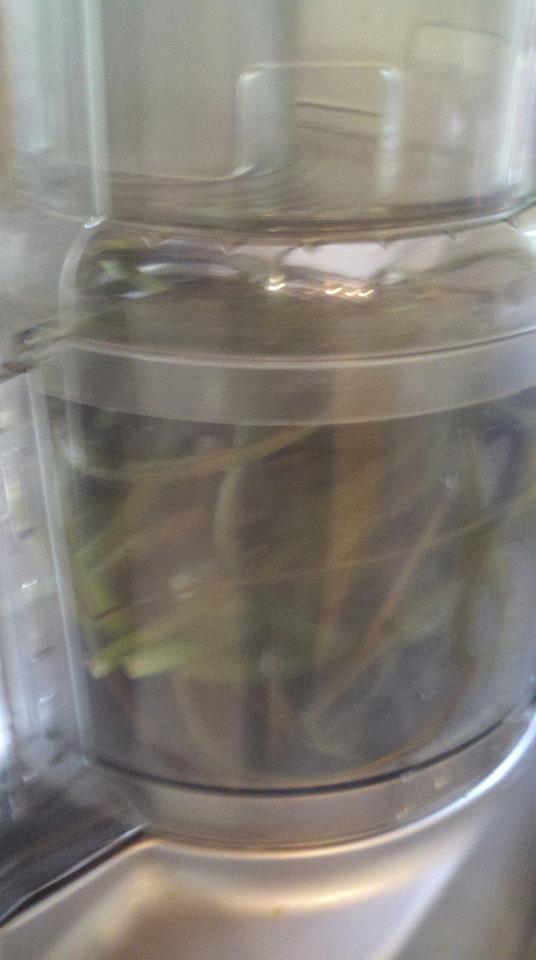
2. Shove the scapes into a food processor. Don't worry if you really jam them in they'll fit :) 


Process the scapes with the blade attachment until they are finely chopped. 


Add the egg, ricotta, salt, flour, and the juice of one lemon into the processor. Make sure you measure out the ricotta.


The result should be a thick paste-like dough. 


3. Flour a counter and take out a sharp knife. Set up a floured cookie sheet to put finished gnocchi on. Take the gnocchi one large spoonful at a time and roll in flour. Roll out into a snake-like shape and chop into little gnocchis. This part is really challenging to take pictures of so if you want to see step by step photos feel free to see a past post I did on Ricotta Gnocchi

Ready to go into the boiling water. 

4. Boil a large pot of water on the stove. You can also choose to freeze the gnocchi at this point to cook at a later date. This is a great way to have quick meals ready. To freeze- freeze in a single layer then transfer to a tupperware container once frozen. 
While you are waiting for the water to boil, melt the butter in a saucepan. Chop the mushrooms up and saute in butter. When the mushrooms are brown, add the juice from the 1/2 lemon. Lemon really helps to counteract the intensity of the scapes. 


Drop the gnocchi into the boiling water. Boil for 3-5 minutes. They will float to the top when they are ready. Use a slotted spoon to remove them. Don't drain into a strainer. The gnocchi will stick together and get gummy. 
Top with mushrooms and enjoy!


6.25.2012

Mexican Tuna Casserole


Tuna casserole evokes warm homey memories in many folks. I love to eat it but also adore experimenting with it. This time I decided to replace the cream soup and try to add some Mexican flavors. The results were met with overwhelming support from my husband and son. I love putting a crunchy topping in the ramekins and serving them individually.
You'll notice that in the recipe I use a half can of multiple ingredients. If you want to you can easily double the recipe, or you can double everything but the noodles and cheese and set aside half of the bean mixture to use for dip (it was delicious)!

Mexican Tuna Casserole
Serves 6

2 cups dry egg noodles
1/2 15 oz can black beans
1/2 15 oz can black olives
1/2 cup salsa
1 1/2 cups shredded cheddar cheese
2 cans tuna
handful of tortilla chips

1. Preheat oven to 350. Boil water in a large saucepan on the stove. Add 2 cups of dry egg noodles and set for 8 minutes.


2. In the food processor blend a drained can of black beans, salsa, and olives.


3. Once noodles are done cooking drain them. Mix in two cans of drained tuna. Add black bean mixture to noodles and stir. Add 1/2 of the cheese. 

Divide the mixture between 6 ramekins that have been sprayed with cooking spray. Crumble a few tortilla chips on the top of each one and then top with shredded cheese. (Note: If you want to be able to flip the casseroles out onto plates to serve you can put the tortilla chips and cheese on the bottom. )


Bake for 10 minutes at 350. 


Enjoy!


6.17.2012

Banana Coconut Muffins

Banana Coconut Muffins with Cornmeal & Oatmeal

I have always been a muffin lover. One of my first comments upon arriving in Vermont was that there was a serious lack of good muffins. A lot of coffeeshops didn't carry them, which I am happy to say has changed over the last couple of years. Muffins are magical because my daughter loves them and will sometimes sit in her highchair happily demolishing one for half an hour. That is 30 magical minutes that I have to get stuff done quickly without anyone "helping". I write many blog posts in that 30 minutes. 

These muffins are a great use for bananas that are nearing the end of their life- although you can still make them with ripe bananas. They are egg free and can easily be made vegan by substituting in non-dairy for the milk. The cornmeal gives the muffins a great texture and make them a little denser- which in our house means less crumbs. 

Banana Coconut Muffins
(Makes 1 dozen)

2 bananas- medium
1/2 cup brown sugar
1/2 cup coconut
1 cup cornmeal
1/2 cup oats
1/2 cup milk
2 tsp baking powder
1 tsp baking soda 
1/2 tsp cinnamon
1/2 tsp ginger


 1. Preheat oven to 375. Put bananas in mixer and mix until they are all squashed up. Add in brown sugar and beat until blended. Add in coconut, cornmeal, and oatmeal and mix until all ingredients are moistened. Add spices, baking powder, and baking soda and mix until incorporated. The batter will be really thick. Add the milk in and mix. I use a 1/4 cup measure to add in all my ingredients so that I can then use that measuring cup to dose the batter into the pan. The batter will make 12 muffins and is easily doubled if you have more bananas.
Bake at 375 for 14 minutes.

My daughter loves to sit on the counter to "help" me cook. This is why I try not to use eggs in recipes- she has a love of licking the beaters. 


Enjoy!
Cooling muffins


6.16.2012

Refrigerator Radish Dill Pickles

Radish Dill Pickles

Early in the CSA season there are an abundance of radishes and greens to use. We eat salads nonstop and even experiment a little. My husband was NOT a fan of the mustard green juice I made :)

The ginger juice did not exactly get a "Woo-hoo" response either. 

Radish dill pickles are a new item to my lineup this year but this is now the third batch I've made. They are super simple to make as they are just refrigerator pickles. This means that I don't process them in any way- no hot water bath, no pressure canning- just good old-fashioned vinegar. I'm going to run through the steps but there will be no exact measurements. If you follow the proportions you'll be able to do this with any quantity of radishes. I had a mixing bowl full and it made 3 pint jars and one small canning jar of pickles.

You will need:
Canning jars, bands & caps
Radishes
Fresh Dill
Kosher Salt
Water
Vinegar- I use white

Soak your radishes in water for 5 minutes to remove any loose debris. Agitate the water with your hand to get dirt off of them. Dump the water and carry the bowl over to your cutting board.


Chop the roots and tops off of the radishes and halve or quarter them depending on their size. I keep a little bowl nearby to put the ends in so I can run them to the compost easily.


If you see any black spots on the outside just slice them off. If the spot is on the inside too discard the radish.


Bring the radishes back over to the sink in the bowl and give them one more rinse. Then pack them into your jars. You want to leave about 3/4" at the top for the dill. Wash your dill and take stalks of it off. Curl them into the top of the jar over the radishes. 


Pour vinegar through the dill until the jars are halfway full. 


Sprinkle about 1 teaspoon of kosher salt on the top of each jar. Fill the jars the rest of the way with water.


I top off the dill at this point. I want a lot of dill flavor so I cram as much as I can fit in there. Once your done cap and band the jars. 


Turn them upside down for about an hour on the countertop so that the dill infuses into the vinegar. After an hour put them into the fridge.


Within an hour of making them the pickles will start turning pink. I try to leave them in the fridge for at least a week before we open them to eat. They keep 3-6 months in the fridge. As a fair warning, radishes make stinky pickles. They taste delicious but they are smelly. 

6.13.2012

Life's Lemons & Fun with the Juicer

I've been a little absent. In the most summarized version of events here is what happened:

1. Pregnant, dilated, and staying at parents with limited internet access.
2. Receive phone call from overseas. Father in law who was in Ireland on vacation has been hospitalized. While running routine bloodwork they discover he has leukemia. He will not be able to leave country until he's had a round of chemo.
3. Mad dash to renew husband's passport and buy items to ship there.
4. Have baby.
5. Get baby and toddler passport. (Just in case this takes a bad turn and I have to fly to Ireland with them.)
6. Drive husband to Montreal airport (ticket was half the price of one out of Burlington- at least everyone's passport came in handy). Kiss him goodbye.
7. Take care of the newborn and toddler for two weeks while husband is in Ireland.
8. Husband back. Return to normal life only to be struck down with stomach bug.

That about brings us to now. Since we picked up our farm share yesterday I decided to do some juicing with the toddler. Meet our juicer:


This juicer is a workhorse. My mom had it when we were little and handed it down to me. My now 8 year old developed a fear of it's loud "whirring" noise when he was 4 so we gave the juicer a face to make it "friendlier". He found this amusing. My daughter apparently does too. After initial hesitation......


she warmed up to him......


I hate waste so we juiced some apples that were getting a little squishy, some pears, and a little bit of ginger. It was a hit. 


We also juiced some mustard greens which we got from the farm in abundance. These ones are super spicy and we gave them to daddy as a joke. He made an awesome face. In the next few days we'll be juicing up some extra spinach to freeze in cubes and save for sauces. 

What's your favorite juice?

6.04.2012

CSA Cooking

photo courtesy of Hatch Brook Gardens


This week kicks off the CSA season for us. What, you might ask, is a CSA? Community Supported Agriculture is a partnership between the consumer and the farmer. In this venture you pre-pay for a share of vegetables. This money allows the farmer to plan for their season and purchase needed items. You are taking a risk together with the farmer. If the growing season is overly abundant you share in that abundance. If a rainy season wipes out the tomato crop then you get no tomatoes. Usually the farm sponsors a weekly pickup.

We are members of a CSA called Hatch Brook Gardens located in Hyde Park VT. Last year was their first growing season. We were psyched to support a couple of young farmers and our faith was well placed. I loved their free-choice concept. This meant that we could choose what we wanted from the spread each week and take what we would use during the week. In addition, they offer work days and pot lucks so that we can really participate in the experience.

Once our CSA launches my grocery bill plummets. We eat a vegetable heavy diet during the summer and I love the challenge of cooking everything that our farmers grow. Watch for some fun recipes and canning suggestions.

If you live in the Lamoille Valley area of Vermont feel free to check out Hatch Brook Gardens website and reach out to them. They currently have about 10 shares left for the season. You won't be disappointed!

5.29.2012

What to Have on Hand for Yourself After Baby is Born


I realize I haven't posted in a bit but really I haven't fallen off the face of the earth. A combination of staying at my parents while waiting for Baby Girl to arrive, a family emergency involving my father in law being hospitalized overseas while on vacation, and the baby finally coming kept me away from my computer longer than I expected.

Our newest wee one arrived on May 16th after a brief induced labor. It was the first time I've made it this far- 39 weeks. She was 7 lbs, 3 oz and it is strange to see her wearing outfits that didn't fit her older sister until she was 6 weeks old! She's eating well and I'm happy to say I had my 3rd natural childbirth.

There are lists upon lists out there of what to buy for baby and getting ready to bring baby home. But what about mom? In preparation for my 3rd child I knew what to have on hand so for the uninitiated here is a list of basics that are good to have waiting for you at home. (I apologize in advance if some of this contains TMI.)

- Tylenol
- Motrin (this helps with inflammation and can also help with breast tenderness and inflammation if you become engorged)
- Stool softener (ahh- yes the not so pleasant fun of post natal life that no one likes to talk about. You may have to get stitches. And if you do you'll be happy you had these on hand.)
- Pads. (There will be bleeding. Have them on hand.)
- Instant heat packs or a hot water bottle. Helpful for both bottom pain and breast pain.
- Ice packs. Same deal- bottom and breast engorgement.
- A bucket. (There is something about hormone readjustment after birth that can make some women relive their first trimester nausea. Sadly, I am one of them. So I keep a bucket nearby.)
- A hand pump. (Many breastfeeding mothers will rent a hospital grade pump. These are great. However, in the first few weeks as your nipples adjust to their new job they may be too tender for the pump. I found that a hand pump allowed me to relieve some pressure without feeling like I needed to bite down on a leather strap. I particularly like the Avent handpump. )
- Tank tops. (I was never one to spend a lot on nursing shirts/bras. I have two bras but let's be realistic. If I'm at home I probably am just going to have my shirt pulled down. Tank tops work great, pick up a few cheap and you won't care when you're covered in spitup and leaking milk. )
- Food. Breastfeeding makes me ravenous so I stocked the cupboards ahead of time with one handed snacks like granola bars (I made mine using this recipe), presliced and frozen homemade loaves of bread that I could microwave one at a time, popsicles (they make me happy and are easier to eat than ice cream) and loads of cut up fruit. I also made some mason jar salads for quick lunches.

Hope this helps soon to be moms out there. It will all even out in the first few weeks. (If it counts for anything I am typing this with a Mombo pillow around me and am currently breastfeeding.) What did you like to have on hand for after birth?

5.09.2012

Peanut Butter Chocolate Mousse


It seems only fitting that I post this on the 34th anniversary of Ben & Jerry's opening in Vermont. My husband and I are avid ice cream lovers. A pint of Ben & Jerry's is one of the main line items on our "entertainment budget" along with a movie from Redbox. But alas, it's just not good for our waistlines to eat a pint that often. I've seen several versions of this recipe on Pinterest but we are a little lazy here and don't refreeze the recipe after blending it. This leaves us with a rich and delectable mousse-like treat. One that we don't feel bad about indulging in.

Peanut Butter Chocolate Mousse
(serves 4 small dishes, or 2 adults who really want a pint to eat)

2 bananas
1 large spoonful of peanut butter (about 1.5 TBS, you can add more to taste)
1 TBS unsweetened good quality cocoa (don't skimp- the result is way better with a quality cocoa)

1. Slice up 2 bananas and put them in the freezer for at least an hour. Since my motto is "Be Prepared" I just keep a perpetual supply of frozen banana slices. What can I say, I like instant satisfaction and I have a child who is teething and enjoys eating frosty treats.


2. Take the frozen bananas and throw them in a food processor fitted with a blade attachement. Pulverize them until they are gravelly looking. Don't worry if they're not smooth. The peanut butter will smooth them out. 


3. Add a large spoonful of peanut butter. Add more if you want a stronger peanut butter taste. Blend again. If the mousse isn't whipping smooth add a tiny bit more. 


 4. Add a tablespoon of good quality unsweetened cocoa powder. Blend.


5. Spoon into bowls and serve. Enjoy your frosty confection. If you prefer you can also scoop into popsicle molds and make popsicles with this recipe. 


5.04.2012

Spinach and Mushroom Biscuits


It's been one of those weeks. After going to the hospital Tuesday night thinking "it was time" I was discharged. Sure my contractions were 2 minutes apart but I stopped dilating shortly before I hit 4 cm so I was sent on my merry way. Since then we've been in limbo. My son came in a little over an hour from the time that my water broke and I realized I was in labor. My daughter was born in less than 4 hours from my water breaking and it would have been faster if they hadn't slowed me down with medication because of a low heart rate. So, living about 1 hour and 15 minutes from the hospital has caused much logistical planning and some nights spent at my parents house (10 minutes from the hospital). After deciding to "brave" it tonight at home I was rummaging through the fridge trying to figure out what I needed to cook that wouldn't last if we were out of the house for another three days. Finding some hard boiled eggs, spinach & mushrooms I decided that biscuits were the best vehicle for them.

Lately I've had a love affair with biscuits. I bake batch after batch, smothering them in jam and butter. It might even qualify as a fetish. And I couldn't be happier with this Spinach & Mushroom version. My husband proclaimed them "awesome" and they will be on a regular rotation here because they contain the correct combo of speed, ease, and low cost.

Spinach Mushroom Biscuits
(Makes 8 biscuits- there will be extra spinach mushroom filling to eat as a side for lunch the next day)
Just want to make plain biscuits- gather the ingredients up through the asteriks & follow instructions below!

2 cups flour
1 TBS baking powder
1/2 tsp kosher salt
1/4 tsp baking soda
6 TBS butter
1 cup buttermilk (you could use regular milk but the buttermilk is sooo good!)
*****
8 oz sliced mushrooms
1/2 lg shallot
1 TBS oil
1/4 cup white wine (optional)
1/2 tsp kosher salt
1/4 tsp black pepper
8 oz spinach
2 hard boiled eggs

1. Preheat oven to 450. In your mixer combine 2 cups flour, 1/4 tsp baking soda, 1/2 tsp kosher salt and 1 TBS baking powder.

Run the mixer for a minute to blend it all. 
Take the 6 TBS cold butter and chop it into little pieces.


Throw it into the mixer a couple pieces at a time with the blade running. 

The little butter chunks will start to get mashed into the flour. 

Measure out a cup of buttermilk. You could use regular dairy but the buttermilk flavor is amazing and incomparable.


Add the buttermilk into the mixer and mix until combined and sticky. There will still be tiny chunks of butter. This is ok. 

Flour a cutting board to dump the dough onto.


Using a spatula, put a chunk of dough onto the flour. If you're making plain biscuits you can dump the whole batch out- if you'll be doing the spinach mushroom filling it's easiest to work with one quarter of the dough at a time. 


For the filling, chop half of a shallot finely. Saute in a tablespoon of olive oil. 


Pre-sliced mushrooms were on sale so that is what I bought. I threw them into the food processor quickly to mince them so that they would be "filling-sized". 

Saute the shallots and the mushrooms together until golden brown. Add 1/4 cup of white wine (optional). Add salt and pepper. 


Add 8 oz spinach. I roughly chopped mine. Stir a few times. You want it to wilt. 


Once the spinach has wilted turn the heat up a tiny bit just to evaporate any excess liquid in the pan. 


Dice up two hard boiled eggs. Toss them into the pan with the spinach and mushrooms and turn off the heat. Toss to combine. 


My sous chef was growing restless and kept trying to pull down my pants so I gave her the mixer attachment to lick. I think she likes biscuits too. :) 


Ok, back to the biscuit dough. You've already put a quarter of it onto your flour covered board. Use your palms to gently flatten it. Do NOT roll it out. Rolling it out presses all the air out and they won't puff up all pretty. 


Now fold it in half and flip it so that the top side is now down in the flour. Flatten it again and repeat this step about 2 more times. This helps to add air so that the layers bake up fluffy. 


At this point my hands were covered in flour and the sous chef kept yelling for daddy so I missed a photo. With the dough flat you want to spread one side of it with some of the mushroom and spinach filling. Then, fold the other side over to cover the filled side. 

Filled and folded over. 

Flatten it out a little bit more, gently- so that the filling doesn't come out. 

Use a pint glass top to cut the biscuits out. Same deal if you decided not to fill them. It is very important to just push the pint glass straight down without twisting it. You should hear a little burping noise when you push down. That is good! It means your biscuits have air in them and will puff up (can you tell that puffing up is a really good thing yet?). Do not twist the glass. Twisting the glass as you cut crimps the edges and will yield flat dense biscuits. 


Your biscuits should look like this:


Repeat the above process until you've used all your dough. You will probably have some leftover filling. That's fine. You can serve extra with the biscuits or save it for lunch the next day. I like to spread it on crackers.

You can also make calzone shaped biscuits if you feel more comfortable. Just put some filling on and stretch the dough over.


Bake at 450 for 8 minutes. They will look delectable and golden brown when they come out. 


If you chose to not fill the biscuits and make plain ones they'll look lovely and golden too! I make these all the time- the height and the fluffiness is my ideal drool-worthy biscuit. 


Serve immediately. They taste best warm. Enjoy!

Spinach Mushroom Biscuits